|
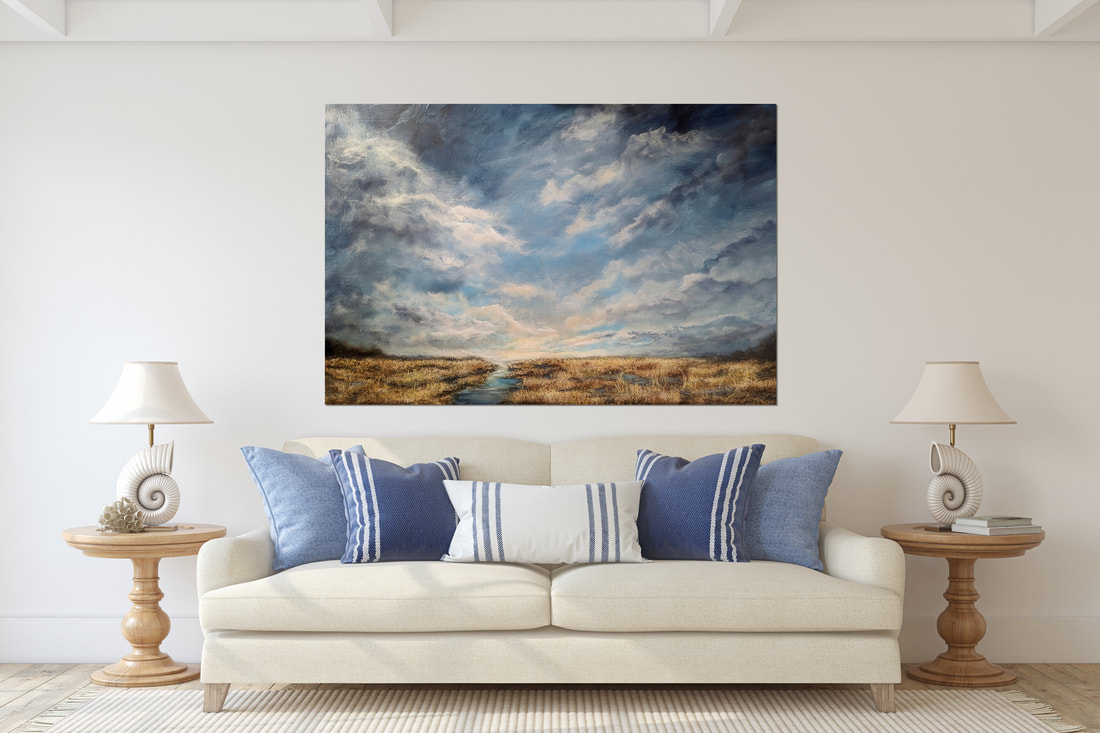
I painted a large painting last week {available as a background for you guys here!} and I thought you might enjoy seeing the process of this painting come to life. Enjoy!
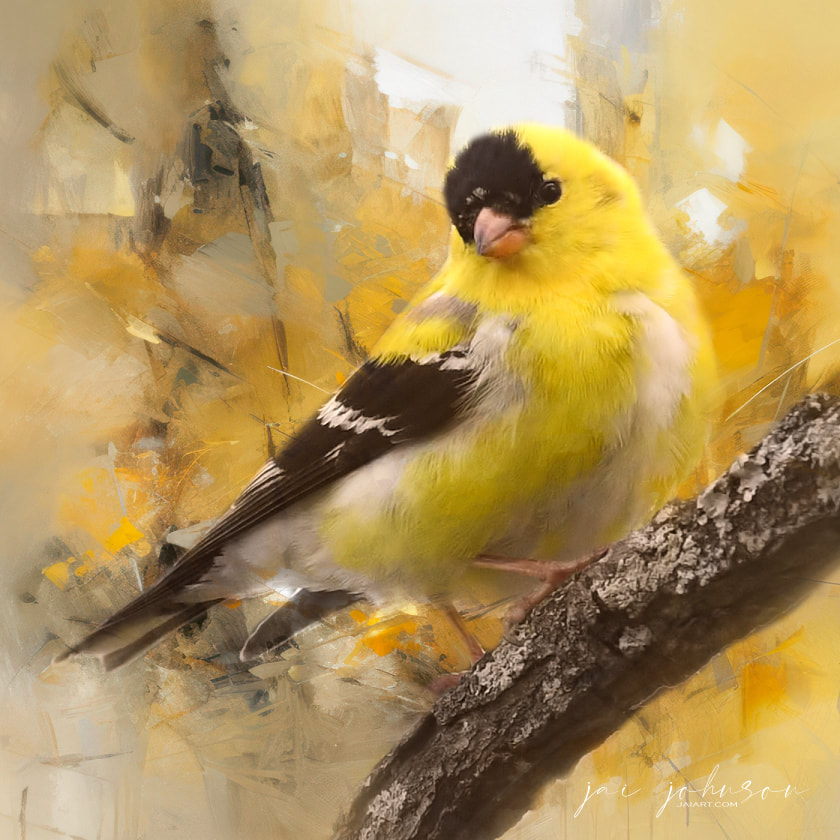
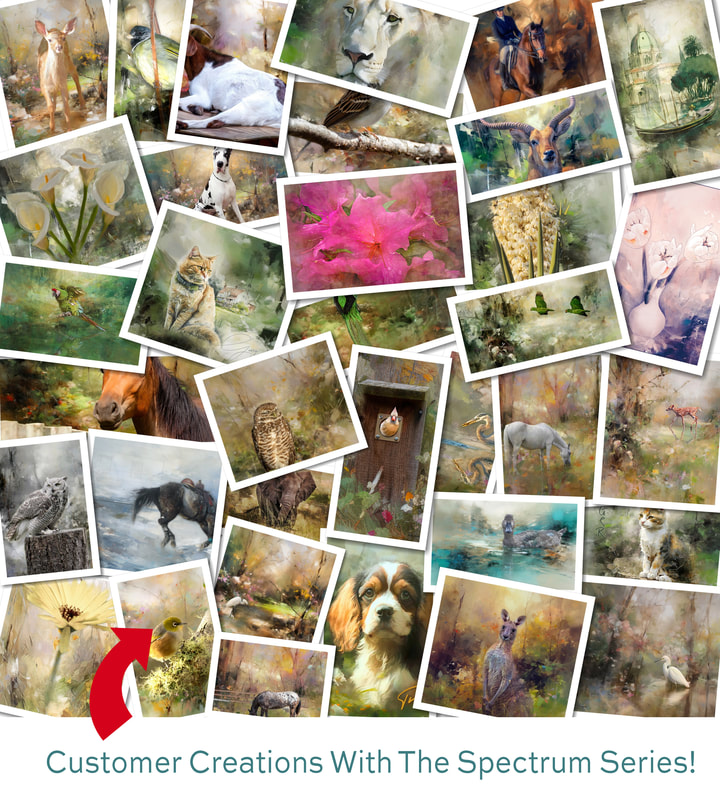
In this video, I demonstrate using the new Spectrum textures with one of my goldfinch photos. I hope you enjoy it! The Finished Art:Are you ready to rock and roll with the new Spectrum Series? We are thrilled to introduce our latest collection of abstract painted textures that will inspire your creativity and help you unleash your inner artist. Our customers are already creating some amazing artwork by blending their own photos with textures from the collections in this series. With a wide range of vibrant colors, intricate textures, and expressive brushwork, the possibilities for artistic expression are endless. Whether you're a professional photographer, digital artist, or simply someone who loves to experiment with new creative tools, the Spectrum Series is the perfect choice. Each piece in the series is carefully crafted to offer a unique blend of colors and textures that will infuse your artwork with energy and excitement.
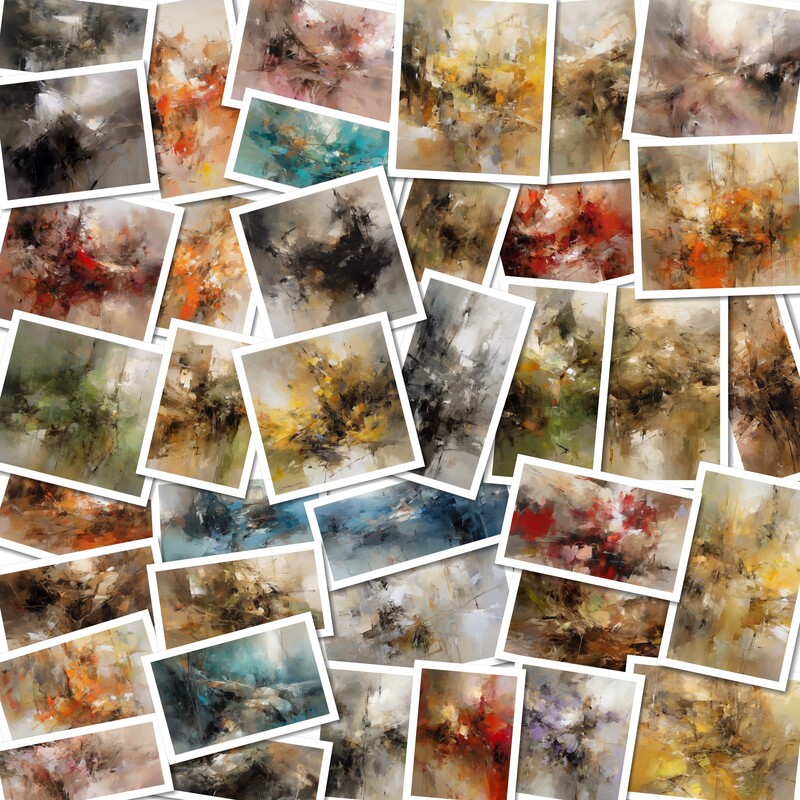
From earthy greens to bright lemon yellows, and from calming blues to passionate reds, the Spectrum Series offers a full range of vibrant hues which will help you create art that reflects your personal style and vision. The best part? The painted textures in this series are meant to be blended with your own photos, allowing you to create entirely new works of art that are filled with depth, dimension, and emotion. Whether you want to create a stunning landscape, a striking portrait, or an abstract composition that defies categorization, the Spectrum Series has everything you need to unleash your creativity and express yourself in new and exciting ways. So what are you waiting for? Come join the party and start rocking and rolling with the new Spectrum Series today! Pet photography is a growing industry, and as a photographer, you want to stand out from the crowd. One way to do this is by using textures, backgrounds, and digital painting to enhance your pet portraits. Textures, backgrounds and digital painting can all add depth, interest, and a unique touch to your photos. In this blog post, we'll explore how you can use textures, backgrounds, and digital painting to enhance your pet portraits for your pet portrait business. Using TexturesUsing textures in post-processing is a great way to enhance your pet portraits and add a unique touch to your photos. Here are some tips on how to use textures in post-processing: 1. Choose the Right Texture When using textures in post-processing, it's important to choose the right texture that will enhance your photo. Look for textures that complement the mood and theme of your photo, and that add interest and depth to the image. For example, if you are taking a photo of a dog in a park, you may want to use a texture that adds depth to the grass or leaves in the photo. Alternatively, if you are taking a photo of a cat with a more delicate personality, you may want to use a texture that adds a soft and feminine touch to the image. 2. Apply the Texture Once you have chosen the texture you want to use, you can apply it to your photo using editing software like Photoshop or Paint Shop Pro. There are several ways to apply a texture to your photo, including using a blending mode or a layer mask. When applying a texture, it's important to adjust the opacity and blending mode to ensure that it looks natural and doesn't overwhelm the photo. You may also want to adjust the color of the texture to match the colors in your photo. 3. Blend the Texture After applying the texture to your photo, you may want to blend it with the original image to make it look more natural. You can do this by using a layer mask to selectively blend the texture with the original image, especially around the edges of the subject. Using a layer mask allows you to remove the texture from certain areas of the photo, such as the main subject or other important elements. This helps to ensure that the texture doesn't distract from the main subject of the photo. 4. Experiment with Different Textures Finally, when using textures in post-processing, it's important to experiment with different textures to see which ones work best for your photos. We have many texture packs available online that you can use to add interest and depth to your photos. Our textures can also be used as backgrounds, which will help tone your image and get rid of any distracting background elements which may be in your pet photo. By experimenting with different textures, you can find the ones that complement your photos the best and add a unique touch to your pet portraits. Using textures in post-processing is a great way to enhance your pet portraits and add a unique touch to your photos. By choosing the right texture, applying it correctly, blending it with the original image, and experimenting with different textures, you can create beautiful and interesting pet portraits that stand out from the crowd. Using Different BackgroundsUsing different backgrounds is a great way to give your pet portraits a new sense of place and create a unique look for your photos. Here are some tips on how to use different backgrounds to enhance your pet portraits: 1. Choose the Right Background When choosing a background for your pet portrait, it's important to consider the mood and theme of your photo, as well as the personality of your pet. You want to choose a background that complements the colors, textures, and tones in your photo and adds interest and depth to the image. For example, if you are taking a photo of a dog with a more rugged personality, you may want to use a background that has a more rustic or outdoor feel to it. Alternatively, if you are taking a photo of a cat with a more delicate personality, you may want to use a background that has a softer, more feminine look to it. 2. Use a Physical or Digital Background You can use either a physical or digital background for your pet portraits. A physical background is a tangible object or material that you can use as a backdrop for your photo, such as a piece of fabric, a blanket, or a natural element like rocks or leaves. On the other hand, a digital background is an image that you can add to your photo using editing software like Photoshop or Paint Shop Pro. There are many digital background packs available on our website which you can use to add interest and depth to your photos. 3. Match the Background to the Pet's Personality When using a background to enhance your pet portraits, it's important to match the background to the pet's personality. This helps to create a cohesive and interesting photo that reflects the pet's unique characteristics. For example, if you are taking a photo of a cat with a more playful personality, you may want to use a background that has bright colors or patterns to match their energy. Alternatively, if you are taking a photo of a dog with a more serious or stoic personality, you may want to use a background that has a more muted or neutral tone to match their demeanor. 4. Consider the Lighting When using a background for your pet portraits, it's important to consider the lighting of the photo. The lighting can affect the way the background looks in the photo, and it can also affect the way the pet appears in the image. For example, if you are using a physical background, you may want to position your pet so that they are facing the light source to avoid shadows or uneven lighting on the background. Alternatively, if you are using a digital background, you may want to adjust the brightness, contrast, or saturation to match the lighting of the original photo. Using different backgrounds is a great way to give your pet portraits a new sense of place and create a unique look for your photos. By choosing the right background, using a physical or digital background, matching the background to the pet's personality, and considering the lighting of the photo, you can create beautiful and interesting pet portraits that stand out from the crowd. Create A Digital Painting Of Your Pet PortraitTurning a pet's photo into a digital painting is a great way to create a unique and personalized piece of art that your clients will love. This process involves using digital painting software {such as Photoshop, Corel Painter, or Procreate} or techniques to create a painted effect on the photo, which can be printed and framed or used on a variety of products like canvas prints, phone cases, or mugs. Here are some ways turning a pet's photo into a digital painting can increase sales of prints and other products: 1. Personalization By turning a pet's photo into a digital painting, you are creating a one-of-a-kind piece of art that is personalized to the client's pet. This adds a special and sentimental value to the piece, making it more likely that the client will want to purchase prints or products featuring their beloved pet. 2. Artistic Appeal Digital paintings have a unique artistic appeal that can enhance the overall aesthetic of your pet portraits. The painted effect adds texture, depth, and dimension to the photo, making it more visually interesting and appealing to clients. 3. Versatility Once you have created a digital painting from the pet photo, you can place it on a variety of products and prints. This allows you to offer a wider range of products to your clients, increasing the likelihood that they will purchase from your business. 4. Higher Price Point Because digital paintings are a more specialized and personalized product, they can command a higher price point than regular prints or products. This can increase your profits and help to grow your business over time. Overall, turning a pet's photo into a digital painting is a great way to add value to your pet portrait business and increase sales of prints and other products. By offering this unique and personalized service, you can differentiate yourself from other pet portrait photographers and create a loyal customer base that will keep coming back for more. Products You Can Offer Your ClientsHere are some of the different kinds of products you can offer to your clients through your photography website, which can increase revenue:
1. Prints Offering prints of your pet portraits is a great way to generate revenue for your business. You can offer prints in a variety of sizes and materials, such as traditional paper prints, canvas prints, or metal prints. Offering different print sizes and materials allows you to offer different price points to cater to a wider range of clients. 2. Other Art Products In addition to traditional prints, you can also offer other types art products featuring your pet portraits. This includes products such as framed prints, gallery wraps, or acrylic prints, and even products such as tapestries and blankets. Offering other types of wall art is a great way to showcase your pet portraits as a statement piece in the home, which can help to increase the perceived value of your photography services. 3. Digital Files Offering digital files of your pet portraits allows your clients to share their images online or make their own prints. This is a convenient option for clients who want to use their images on social media, create their own photo books, or print their own products. You can offer digital files as individual images or as a package deal. 4. Photo Books Creating custom photo books featuring your pet portraits is a great way to offer a high-end product to your clients. You can design the layout of the book, choose the photos to include, and offer a variety of cover options such as leather, linen, or hardcover. Offering photo books can increase the perceived value of your photography services and provide a tangible keepsake for your clients. 5. Additional Fun Photo Gifts Clients Enjoy You can also offer a variety of gift products which feature your pet portraits, such as phone cases, mugs, or tote bags. These products can be customized with the pet's portrait, which can increase the perceived value of the product and create a unique and personalized item for your client. In conclusion, offering a range of products to your pet portrait clients can help to increase revenue for your photography business. By offering prints, other art products, digital files, photo books, and other fun photo gifts, you can cater to a wider range of clients and increase the perceived value of your photography services. In this blog post, I want to talk about selling your art you create using your photos blended with our backgrounds and textures. There are various ways and marketplaces where you can sell prints of your fine art to consumers. In this post, I'm going over a few of these to give you some ideas to get started if you're interested in selling your work. Sell Your Art Direct To ConsumersIf you're interested in selling your work direct to consumers, these ideas may help you get started. 1. Art Fairs and Craft Shows - Art fairs and craft shows are great places to sell your photo art in person. These events allow you to showcase your work to a local audience and make personal connections with potential customers. Look for events in your area that cater to your target market and consider investing in a professional display to make your booth stand out. 2. Farmers Markets and Street Fairs - Farmers markets and street fairs are another option for selling your photo art in person. These events often attract a large crowd, and the relaxed atmosphere can make it easier to connect with customers. Make sure to bring plenty of prints and have a variety of sizes and styles available to cater to different preferences. 3. Local Shops and Galleries - If you prefer a more permanent storefront, consider reaching out to local shops and galleries to see if they're interested in selling your photo art. Look for shops that cater to your target market and offer a commission-based arrangement that works for both parties. Make sure to have a portfolio of your work and a clear pricing structure to make it easier for the shop owner to make a decision. 4. Pop-Up Shops and Art Exhibitions - Pop-up shops and art exhibitions are temporary storefronts that allow artists to showcase their work to a larger audience. Look for events in your area that cater to your target market and consider collaborating with other artists to create a cohesive display. Make sure to bring plenty of business cards and promotional materials to help potential customers find you online. 5. Private Events and Corporate Spaces - Finally, consider reaching out to private event organizers and corporate spaces to see if they're interested in purchasing your photo art. Private events, such as weddings and parties, often require unique decorations and can be a great opportunity to showcase your work. Corporate spaces, such as offices and lobbies, may be interested in purchasing large prints to add color and visual interest to their spaces. Creating Custom Art For ClientsCreating custom art for clients is another great way to sell your photo art. Here are some details about doing custom photo art for people, such as pet portraits or wedding portraits: 1. Determine Your Niche - Before offering custom photo art, it's important to determine your niche. Think about what type of photo art you enjoy creating and what type of customers you want to attract. For example, if you love photographing animals, you might specialize in pet portraits. If you have a passion for weddings, you might specialize in wedding portraits. By specializing, you can create a unique selling proposition and attract customers who are looking for your specific expertise. 2. Set Your Prices - When offering custom photo art, you'll need to set your prices based on the type of work you'll be doing and the time it takes to complete each project. Make sure to consider the cost of materials, such as printing and framing, as well as the time you'll spend communicating with clients and editing the final product. You may also want to research what other photographers are charging for similar services in your area to make sure your prices are competitive. 3. Create a Portfolio - To attract potential clients, you'll need to create a portfolio of your previous work. Make sure to showcase a variety of styles and subjects to give clients a sense of your capabilities. If you're just starting, consider offering discounted rates to friends and family in exchange for using their photos in your portfolio. 4. Market Your Services - Once you've determined your niche, set your prices, and created a portfolio, it's time to start marketing your services. Reach out to potential clients through social media, your website, and word of mouth. Consider collaborating with other wedding vendors or pet-related businesses to offer bundled services or cross-promote each other's businesses. You may also want to consider paid advertising on social media or local publications to reach a larger audience. 5. Communicate with Clients - When working on custom photo art, it's important to communicate clearly with your clients to ensure you're meeting their expectations. Make sure to discuss their needs and preferences, the timeline for the project, and any potential challenges that may arise. Consider sending clients a contract that outlines the scope of the project, your prices, and your policies for revisions or cancellations. Offering custom photo art, such as pet portraits or wedding portraits, can be a rewarding way to use your photography skills and turn your passion into a business. By determining your niche, setting your prices, creating a portfolio, marketing your services, and communicating clearly with your clients, you can create a successful business that offers personalized and unique photo art to your customers. Selling Online - Print on Demand WebsitesThere are many websites online where you can sell art prints or place your photo art on various products. I discuss a couple of my favorites below. For a super comprehensive list of places to sell your art online, visit this website where you'll get a list of 250+ places, many of which are print on demand websites. Selling Art On Fine Art AmericaIf you're an artist looking to sell your artwork online, Fine Art America is a great platform to consider. I've been with them over 14 years! Founded in 2006, Fine Art America has become one of the largest online marketplaces for buying and selling art, with millions of visitors each month. Below, I give you a basic introduction to selling your art on Fine Art America. 1. Create an Account To get started, head over to Fine Art America's website and create an account. The signup process is straightforward, and you'll need to provide basic information like your name, email address, and a username. Once you've created an account, you can start uploading your artwork. 2. Upload Your Artwork Fine Art America allows you to upload a variety of artwork, including paintings, drawings, photographs, and digital art. When you upload your artwork, you'll need to provide some basic information like the title, medium, description and tags which describe your work. You'll also need to choose which products you want your artwork to be available on. Fine Art America offers a wide range of products, including art prints, framed prints, canvas prints, greeting cards, phone cases, and more. You can choose to make your artwork available on all products, or you can select specific products. 3. Set Your Prices Fine Art America allows you to set your own prices for your artwork. You can choose to set a fixed price for each product or enable the "markup" feature, which allows you to add a percentage markup to the base price of each product. The markup feature is useful if you want to earn a specific amount of money per sale. 4. Promote Your Artwork Once your artwork is uploaded and available for sale, it's time to start promoting it. Fine Art America has a built-in social media sharing feature that allows you to share your artwork on social media platforms like Facebook, Twitter, and Pinterest. You can also create your own website or blog and embed Fine Art America's "buy now" buttons to make it easy for people to purchase your artwork. Fine Art America also has a built-in email marketing feature that allows you to send newsletters and promotions to your customers. You can use this feature to announce new artwork, special promotions, or upcoming exhibitions. 5. Fulfill Your Orders When someone purchases your artwork on Fine Art America, the company handles all the fulfillment for you. YAY! They'll print your artwork, package it, and ship it directly to the customer, which is absolutely wonderful, as this leaves you more time to create. You'll receive a notification when a sale is made, and you can track the status of the order through your account dashboard. 6. Get Paid Fine Art America pays you for your sales on a monthly basis. Payments are only made via Paypal, so you'll need to have a Paypal account set up to get paid. You will receive your markup on the product once the sale clears, so there is a slight delay in getting paid to cover possible customer returns. Selling your art on Fine Art America can be a great way to reach a wider audience and make money from your artwork. By following these steps, you can get your artwork uploaded and available for sale in no time. Remember to promote your artwork and engage with your customers to build a following and increase your sales. Selling Art On ZazzleSelling on Zazzle.Com is another way to monetize your creations. Zazzle is an online marketplace that allows artists to create and sell their own custom products, such as clothing, accessories, home decor, and more. Here are some tips for selling your art on Zazzle: 1. Choose your artwork carefully - When selling your art on Zazzle, it's important to choose your artwork carefully. Consider what types of products your artwork would look good on, and what types of customers might be interested in purchasing those products. Additionally, make sure that your artwork is of high quality and resolution, so that it looks good when printed on products. 2. Set up your store - Once you've chosen your artwork, it's time to set up your store on Zazzle. This involves creating an account, choosing a store name, and designing your storefront. When designing your storefront, make sure to choose a theme that complements your artwork and reflects your personal style. 3. Create products - After setting up your store, it's time to start creating products using your artwork. Zazzle offers a variety of products that you can customize with your artwork, including t-shirts, phone cases, stickers, and more. When creating products, make sure to choose high-quality materials and printing options, so that your products look and feel professional. When you create your products, you can select your preferred royalty for each product. You can set a specific percentage across the board for all products, or you can set a different royalty for the different products. 4. Promote your products - Once you've created your products, it's time to start promoting them. You can do this by sharing links to your products on social media, creating email marketing campaigns, and using Zazzle's built-in promotion tools. Additionally, consider reaching out to bloggers or influencers in your niche, and offering them a discount or free product in exchange for a review or feature. 5. Monitor your sales - Finally, make sure to monitor your sales and adjust your strategy as needed. Pay attention to which products are selling well, and consider creating more products in similar styles or themes. There are other print on demand websites similar to Zazzle, such as Cafepress, Society6, and Redbubble. I've had stores on all of them at one time or another. Society6 only lets you set your preferred royalty on prints, and the royalty on the other products is standard across the board for everyone. Make sure you read the pricing/royalty arrangements for each website you consider before setting up shop. Selling Art On EtsyI personally don't sell on Etsy, but I know many people who do, and I do shop on Etsy. Etsy is a popular online marketplace where artists and creators can sell their handmade or vintage items, as well as craft supplies and unique digital products. If you're an artist looking to sell your art online, Etsy can be a great platform to showcase your work and reach a wider audience. Here are some tips for selling your art on Etsy: 1. Set up your shop - The first step to selling your art on Etsy is to create an account and set up your shop. This involves choosing a name for your shop, creating a profile, and adding your artwork to your shop. Make sure to take high-quality photos of your artwork and provide detailed descriptions, so that potential customers can see the details of your work and understand what they're purchasing. Some artists have prints and other products made ahead of time and sell those on Etsy. Some artists and photographers drop ship from other companies, such as Fine Art America, who makes the prints and products and ships for them after they receive an order on Etsy. And others sell digital downloads of their art and designs on Etsy. 2. Research your competition - Before you start selling on Etsy, it's important to research your competition. Look for other artists who sell similar types of artwork, and see how they're pricing their items and presenting their shops. This can give you a better idea of what's selling well, and how you can differentiate yourself from other artists on the platform. 3. Price your items - When pricing your artwork on Etsy, it's important to consider your time, materials, and overhead costs. Make sure to factor in the cost of shipping and packaging as well. It's also a good idea to look at what other artists are charging for similar items, and price your artwork competitively. 4. Promote your shop - Once your shop is set up and your items are listed, it's time to start promoting your shop. You can do this by sharing your listings on social media, creating email marketing campaigns, and using Etsy's built-in promotion tools. Additionally, consider reaching out to bloggers or influencers in your niche, and offering them a discount or free product in exchange for a review or feature. 5. Provide great customer service - Providing great customer service is key to building a successful shop on Etsy. Make sure to respond to customer inquiries promptly, and provide clear and detailed information about your products and shipping policies. Additionally, consider including a personal thank you note or small gift with each purchase, to show your appreciation and build customer loyalty. 6. Continuously improve your shop - Finally, make sure to continuously improve your shop based on customer feedback and sales data. Pay attention to which items are selling well, and consider creating more items in similar styles or themes. Additionally, consider running sales or promotions to boost sales during slower periods. No matter which direction you go with selling your finished art, I want to make something clear -- it's up to YOU to promote your art! Yes, you can have random sales from those who find your prints and products, but you'll do much better if you invest time and even money in advertising and promoting your work. These websites are just a platform - they are not going to help you sell, despite what marketing language they give you. Like everything else in life, if you want something, you're going to have to work for it. :) The various companies have made sharing on social media relatively easy, but creating your own website or blog to draw customers in and direct them to your various platforms is a must, in my opinion. You can see my website here where I do this.
In conclusion, selling your photo art created using textures and backgrounds can be a rewarding way to earn money from your photography and art hobby. With the right platform, pricing, cohesive body of work, high-quality images, and promotion, you can turn your passion into a business. Good luck! ~Jai There's really no "right or wrong" in choosing the right background texture, but some people find it difficult. So in the video below, I've completed the above image, and I take you through some of my decisions and thoughts as to how I chose the background. I cover cropping, mood, color choices, soft edge blending to create lost edges, and what is important to keep and what to leave from the original photo, and why. I hope you enjoy the video! Collections Used:Digital painting has become a popular practice among artists and hobbyists alike, and one trend that has emerged is the practice of painting photos using digital software. This involves taking a photograph and transforming it into a work of art through the use of digital painting techniques. But why would someone want to paint their photos using digital software? Here are a few reasons: 1. Creative expression One of the main reasons people choose to paint their photos using digital software is for creative expression. Digital painting offers a wide range of creative possibilities that may not be possible with traditional media. By painting your photograph, or a photograph which you have edited by adding textures, new backgrounds, and creative lighting changes, artists can add their own personal touch to the image, whether it be through the use of color, texture, or subject matter. This can allow them to explore their own artistic vision and create something truly unique. For example, an artist may choose to paint a landscape photo and add their own interpretation of the scene, creating a more expressive and stylized representation of the original image. They may also use digital techniques to create a sense of depth and atmosphere that goes beyond what is possible with a simple photograph. 2. Preservation of memories Another reason someone might choose to paint their photos is for the purpose of preserving memories. Photographs are a common way of capturing important moments in our lives, but they can be easily forgotten or lost over time. By transforming a photograph into a piece of art, the image becomes more than just a snapshot of a moment in time – it becomes a more lasting and meaningful representation of the moment captured in the photo. For example, an artist may choose to paint a photo of their wedding day, adding their own unique interpretation of the event and capturing the emotions and atmosphere of the day in a way that a simple photograph may not be able to do. People are more inclined to have a print created of a painting they created based on a memorable photo, and the print can then be framed and displayed for a lifetime to commemorate an event or pay tribute to a special person or pet. 3. Exploration of new techniques Digital painting allows artists to experiment with a wide range of techniques and effects that may not be possible with traditional media. By painting a photograph, they can explore different styles, textures, and color palettes without the fear of making permanent mistakes. This can be a great way to develop new skills and techniques that can be applied to other forms of art. For example, an artist may choose to experiment with a new color palette or texture on a photograph, allowing them to explore the potential of these techniques before applying them to other works of art. An artist may give the original photo a totally different style when exploring different painting techniques, which once again can create a work of wall-worthy art. 4. Commercial opportunities Finally, painting photos using digital software can also present commercial opportunities for artists. For example, they may be able to sell their painted photos as prints, license them for use in commercial projects, or create custom pieces for clients. This can be a great way to turn their passion for digital painting into a profitable business. I personally know many pet photographers who have taken their business to a whole new level by offering painted pet portraits! Another example is the artist who chooses to paint a photo of a popular tourist destination and sell prints of the painting to tourists visiting the area. The painting may also be able to be licensed for use in travel brochures or other commercial projects. In conclusion, there are many reasons why someone might choose to paint their photos using digital software. Whether it's for creative expression, preservation of memories, exploration of new techniques, or commercial opportunities, this practice can be a rewarding and fulfilling way to transform ordinary photographs into works of art. So why not give it a try? You may discover a new passion for digital painting that you never knew you had! I teach others how to paint their photos in Procreate on the iPad. When you join Skillshare, you can have access to all of my classes here!
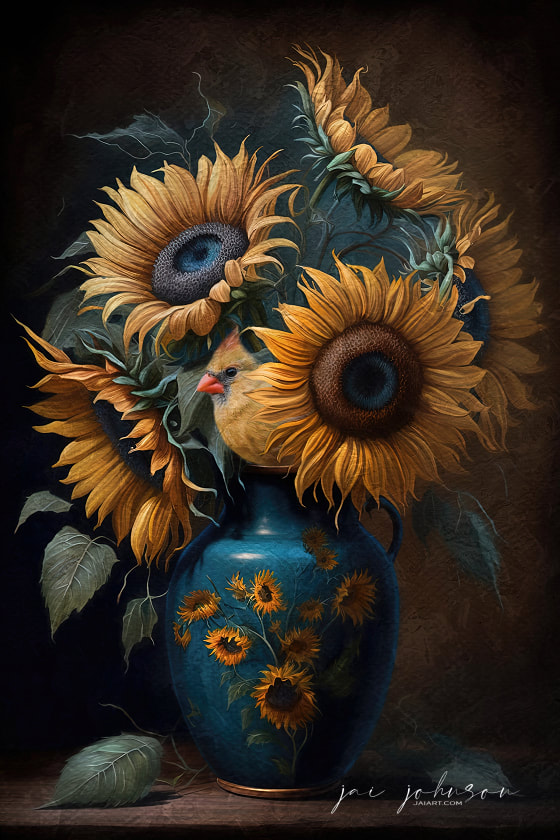
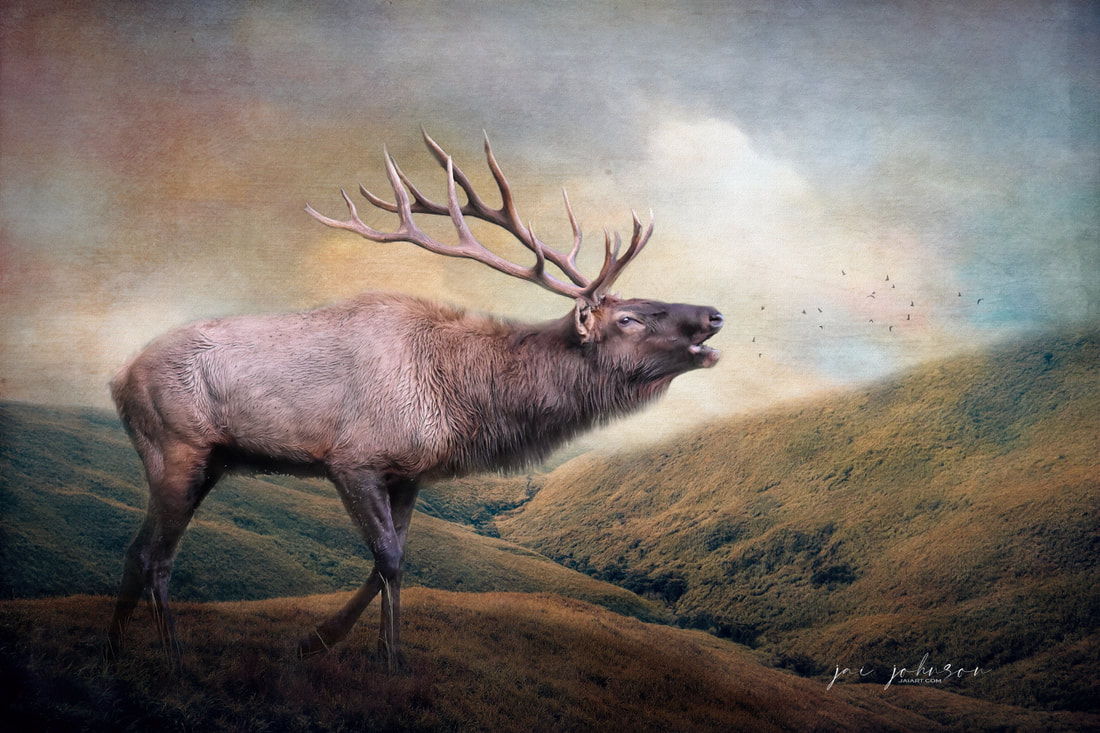
Blending songbird photos with still life photos of flowers in vases can result in beautiful and unique artwork. Here are some tips on how to blend these types of photos together: Step 1: Choose Your Photos Start by choosing your songbird photo and one of the still life floral backgrounds. Make sure the colors in both photos complement each other well. You might consider choosing a photo of flowers that have similar colors to the bird's feathers or that contrast nicely with the bird. Step 2: Edit Your Photos Before blending together, make sure to edit them first. You can adjust the brightness, contrast, and saturation of each if necessary to create a cohesive look between the two. Step 3: Blend Your Photos Using photo editing software, blend the photos together. You can place the bird in the vase among the flowers, perch it on the edge of the vase, or have it fly above the vase if your photos is of a flying bird. To make the bird look like it is a part of the still life, adjust the lighting to make the shadows and highlights match. Step 4: Add Final Touches To enhance the final image, you can add additional elements or effects. You might add a filter to create a vintage look or add text to the image, or add one of our many textures on top to give a whole new look to your art. You can also crop the image to emphasize certain parts of the composition or adjust the saturation to make the colors pop. Step 5: Share Your Artwork Finally, once you're satisfied with the final result, you can share your artwork on social media, in online galleries, or even in physical galleries or exhibitions. You can also print your artwork as a canvas or a framed print. Blending songbird photos with still life photos of flowers in vases can result in stunning works of art that showcase the beauty of nature. It's a great way to give a new look to songbird photos! Also consider adding butterflies and other small insects, or even small reptiles, like cute little tree frogs, into your designs. By following these steps, you can create a unique composition that is both creative and visually striking. Good luck and have fun creating! Collections Used To Create The Above Art:As photographers, we often strive to capture the perfect image. When it concerns wildlife, often the original backgrounds are less than stellar, since they may have cars, people, unwanted buildings, power lines, and other objects which can detract from the subject. But what happens when we take the main subject of those images and transform them into something new and unexpected? That's the idea behind creative reimagining, a process of artistic transformation that involves adding new backgrounds and textures to existing photos to create something new and unique. Creative reimagining is a form of mixed media art that combines photography with digital and traditional art to create visually striking images. By adding new backgrounds and textures, we can give the image a different mood or atmosphere, tell a story, or suggest new meanings or narratives. The process of creative reimagining begins with selecting the right photograph. The ideal photo will have a strong composition and interesting subject matter, but may lack the visual impact we're looking for. It could be a portrait, a landscape, or any other type of photograph. Once the photo has been selected, we can begin the process of adding new backgrounds and textures. This can involve a range of techniques, from simple color correction and cropping to more complex layering, masking away unwanted elements, and blending of multiple images. One approach to creative reimagining is to think about the mood or atmosphere we wish to convey. For example, a portrait of a person might be transformed into a surreal landscape to create a dreamlike, otherworldly image. A street scene might be reimagined as a futuristic cityscape to suggest a vision of the future. A beautiful wildlife subject in captivity can be placed into a scene which is more suitable and natural for the animal or bird. Another approach is to use backgrounds and textures to suggest new meanings or narratives. For example, a photo of a bird might be transformed into a symbol of freedom by adding a big sky background filled with clouds. A photo of a person might be transformed into a representation of an emotion or state of mind by adding an abstract texture. The key to creative reimagining is experimentation and exploration. By trying out different combinations of photographic elements and backgrounds, we can discover new possibilities and create something new and unique. It requires a high degree of artistic skill and vision, as we must have a clear idea of what they want to achieve and how to achieve it. In conclusion, creative reimagining is a process of artistic transformation that allows photographers to explore new possibilities and create something new and unique from existing photographic elements. By adding new backgrounds and textures, we can give the image a different mood or atmosphere, tell a story with our subjects, or suggest new meanings or narratives. It's a form of mixed media art that combines photography with digital and traditional art, and requires a high degree of artistic skill and vision, which as creative people, we all have! If you're a photographer looking for a new creative challenge, try your hand at creative reimagining and see where it takes you! Visit the learn page here on the website to get started! :) NOTE: The background image used with the elk photo above is from the Hills Of Glory Background Collection.
Blending Wildlife Photos with Painted Backgrounds: The Art of Matching Cool and Warm Colors2/9/2023
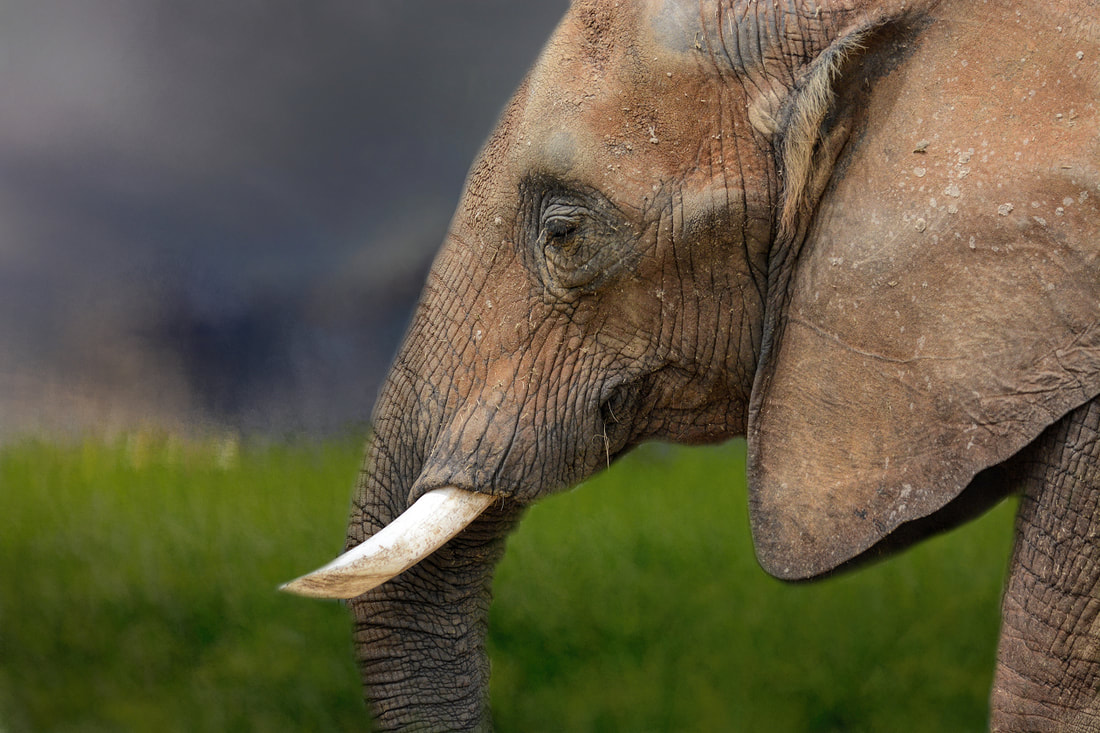
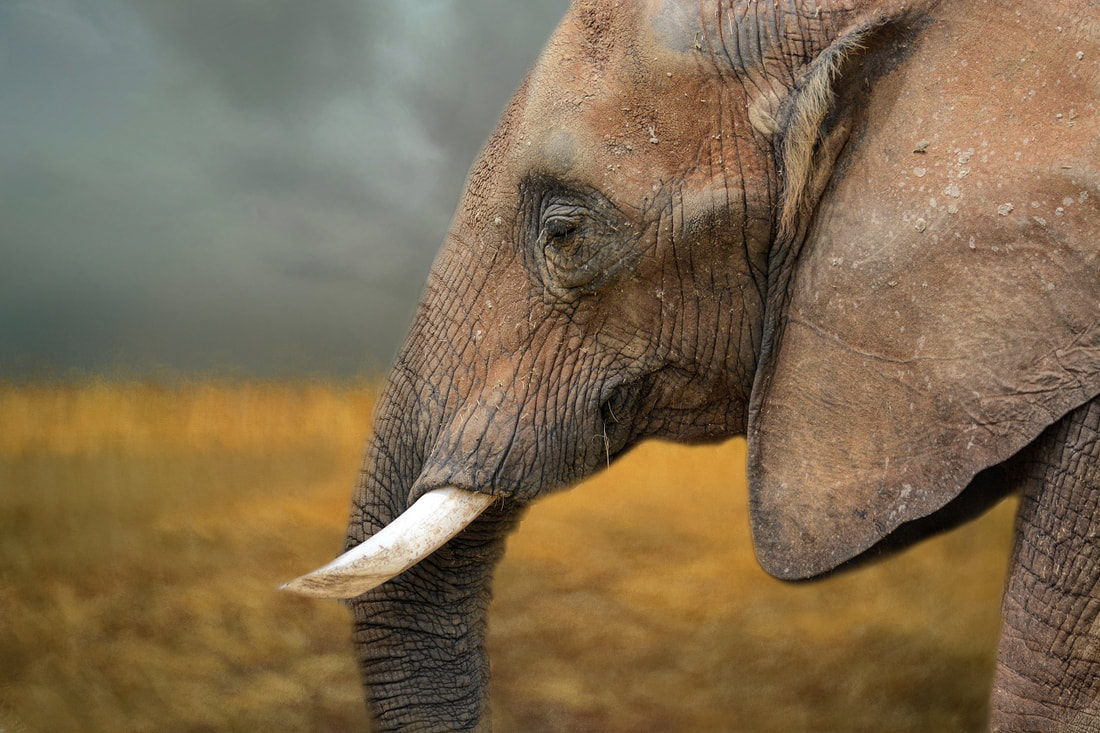
Above: Elephant blended with a cool background {left} and a warm one {right} Wildlife photography is a beautiful and challenging form of photography that captures the essence and beauty of the natural world. However, simply taking a great photo of wildlife is only half the battle; adding a painted background can take your photos to the next level and create truly unique and artistic images. One important aspect of blending wildlife photos with painted backgrounds is understanding the use of cool and warm colors and how to match them up. Cool colors, such as blue and green, are often used to evoke a sense of calm and serenity, while warm colors, such as red and yellow, are used to evoke a sense of energy and excitement. When blending wildlife photos with painted backgrounds, it's important to choose a background color that complements the subject and enhances its natural beauty, and also portrays the mood you wish to share with the world. For example, my photo of a majestic elephant at the zoo can be blended with a warm, orange-hued painted landscape, creating a harmonious and natural-looking environment. On the other hand, the same photo of the elephant can be blended with a cool, blue-hued painted landscape, creating a calm and peaceful atmosphere. In addition to color, it's also important to consider the lighting in the photo and how it will interact with the background. If the photo has warm, golden hour lighting, for example, it may be better to choose a warm, complementary background color, such as a red or orange hue. On the other hand, if the photo has cool, blue-hued lighting, a cool, blue-hued background may be a better choice. In the above two examples, I actually prefer the elephant blended with the warmer toned background, because I feel since the tones of the photo and the background match up, it makes for a better presentation. But either way can be acceptable, depending on what you wish to portray and how your final art is going to be used or displayed. When blending wildlife photos with painted backgrounds, it's important to experiment and find what works best for you. Try combining different cool and warm colors and see how they interact with each other and with the subject. Remember, there are no hard and fast rules, and the goal is to create a harmonious and visually appealing image that enhances the natural beauty of the wildlife subject. In conclusion, blending wildlife photos with painted backgrounds is a unique and artistic approach to wildlife photography that offers endless creative possibilities. By understanding the use of cool and warm colors and how to match them up, you can create truly unique and visually stunning images that showcase the beauty of the natural world. Note: Backgrounds used above are from the Spring Storms Collection.
|
Be sure to join the Daily Texture Mailing list to keep up to date on new collections!
You may find these two links useful: • Frequently Asked Questions • Helpful Links and Information In most of my videos, I use older software which I've used for years. Unfortunately, the software I use isn't being sold anymore.
Many of you have asked me to teach in Photoshop -- but I am just learning myself in that software. In my learning, I have discovered the best Photoshop training on the planet, and I have secured a special offer on this same training JUST FOR YOU! Click the button below to learn from my same trainer, and to save a HUGE amount on this lifetime access course: Please note: Some collections shown in older blog posts have been retired and are no longer available. The blog posts have been left for you to view for learning purposes and examples of what can be done using the Daily Texture resources. As always, for the most current available collections, please visit the store here.
Archives
April 2024
|


 RSS Feed