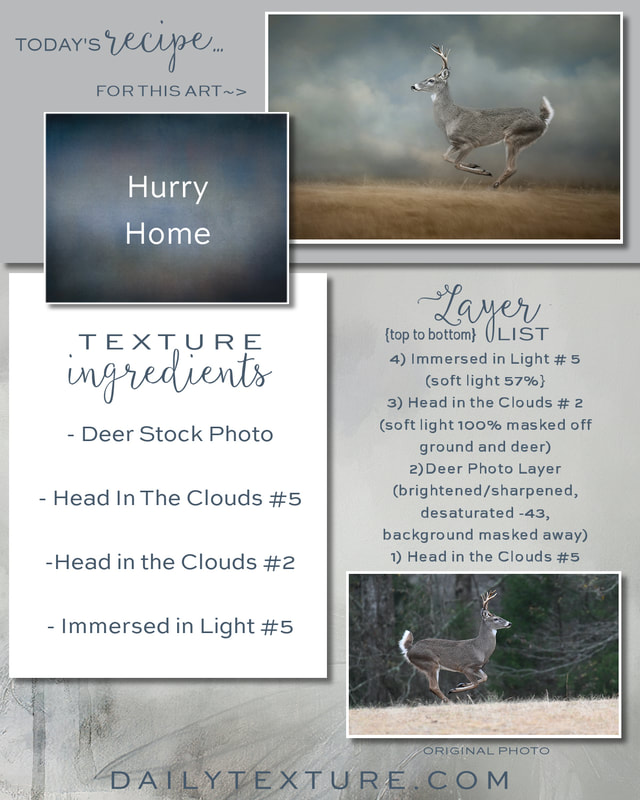
Ingredients to Create This Art:
Deer Stock Photo {from my stock site here} Head in the Clouds Collection Immersed in Light Collection |
"Hurry Home"
Be sure to save/print the recipe image for this art, and see my notes below...
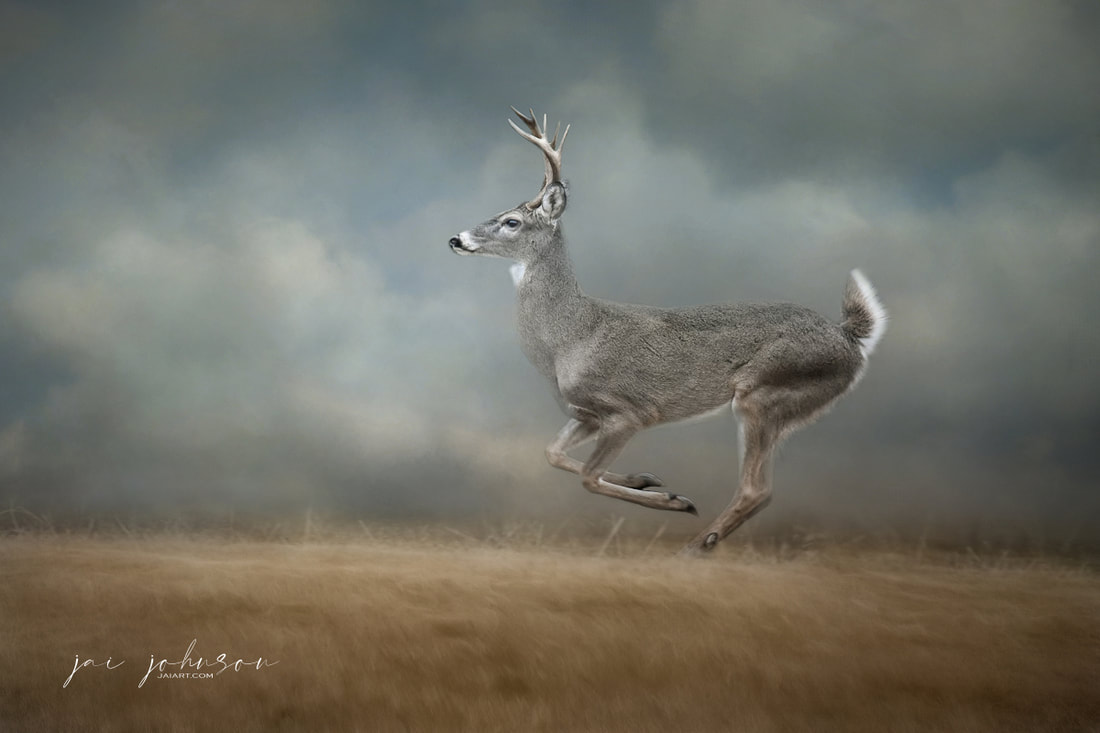
* I love running deer shots...the action gets me every time! This is one of my stock photos available and while the photo is pretty darn good on its own, at a distance, the buck gets a little lost with the woods behind him. This is when I really love to replace the background with something a bit simpler...something which will help the viewer clearly focus on the running deer. The Head in the Clouds Collection was the perfect choice for this handsome fella! I also mirror imaged him when working on the art, because I feel more comfortable working on my animals when they are facing left. Just a personal choice. Now the focus is clearly on this gorgeous animal, and the moody clouds behind him give the impression he is hurrying home before a storm. |
|
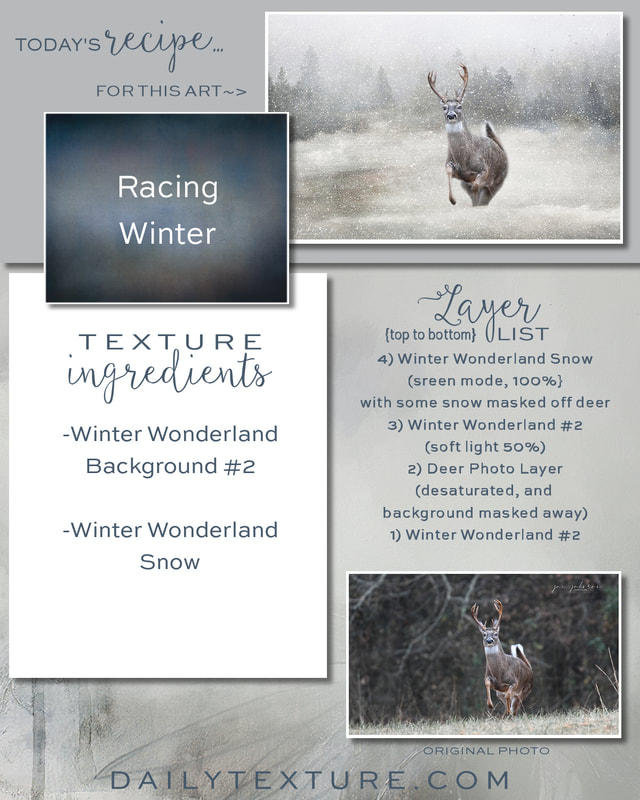
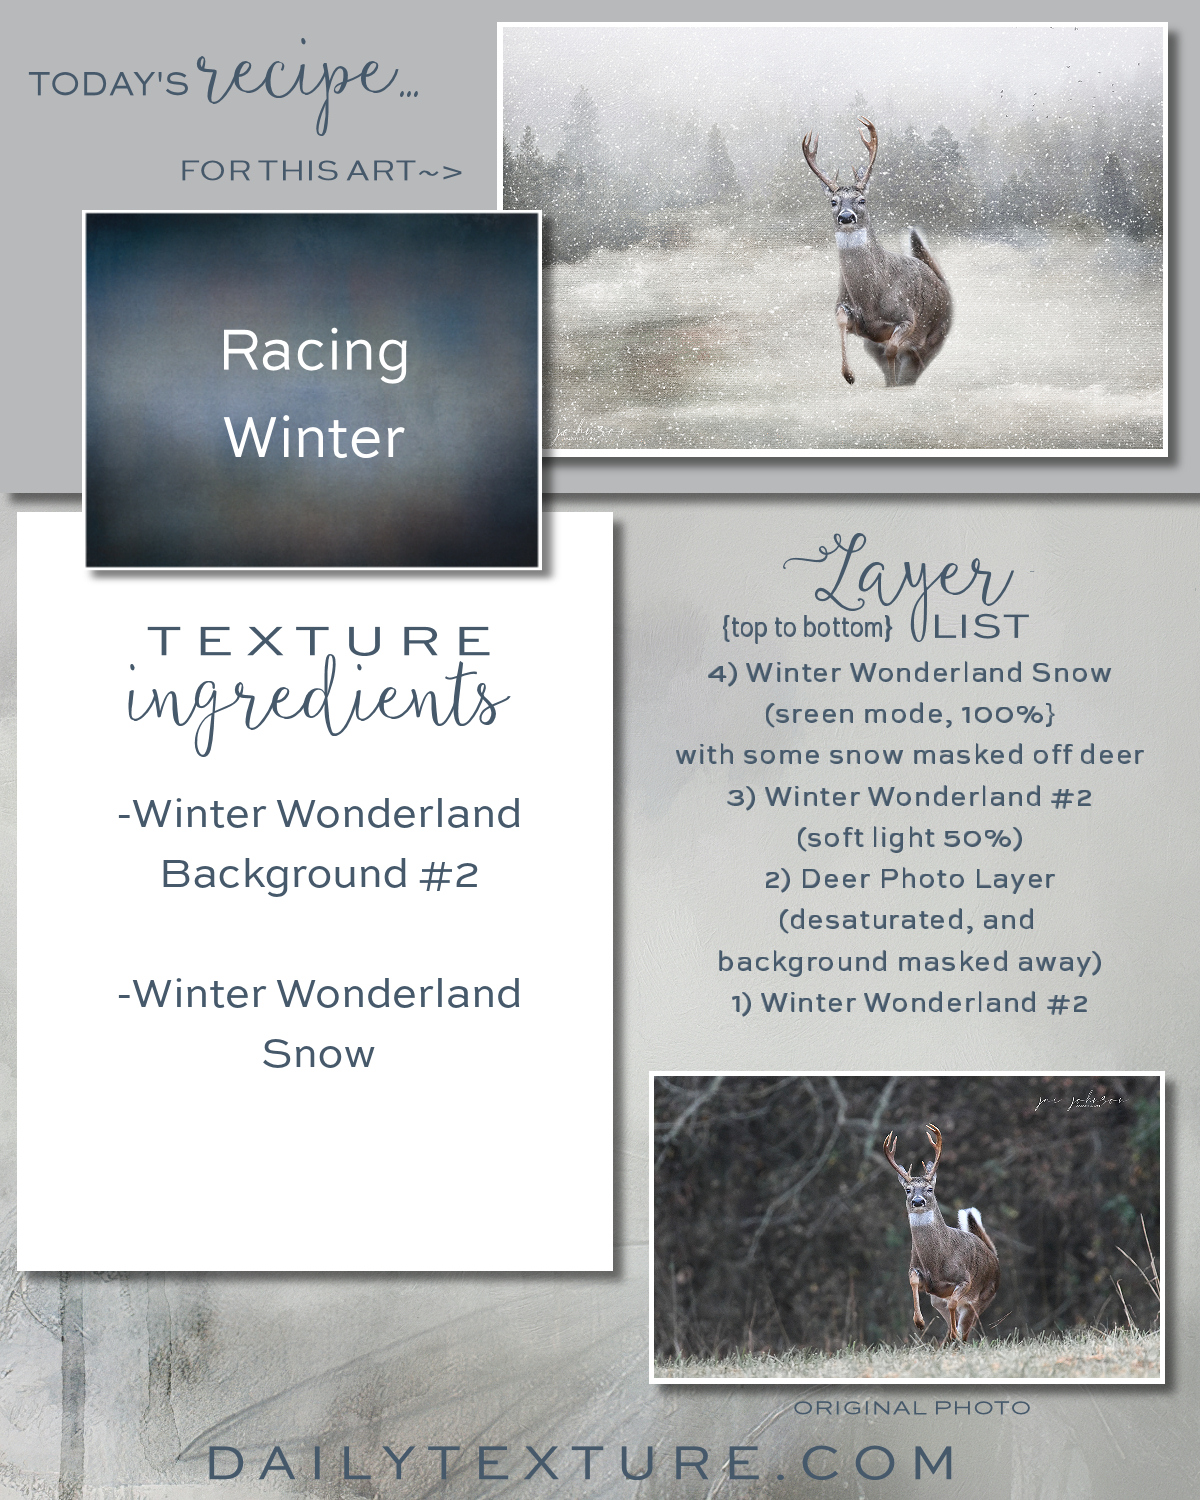
"Racing Winter"
Be sure to save/print the recipe image for this art, and see my notes below...
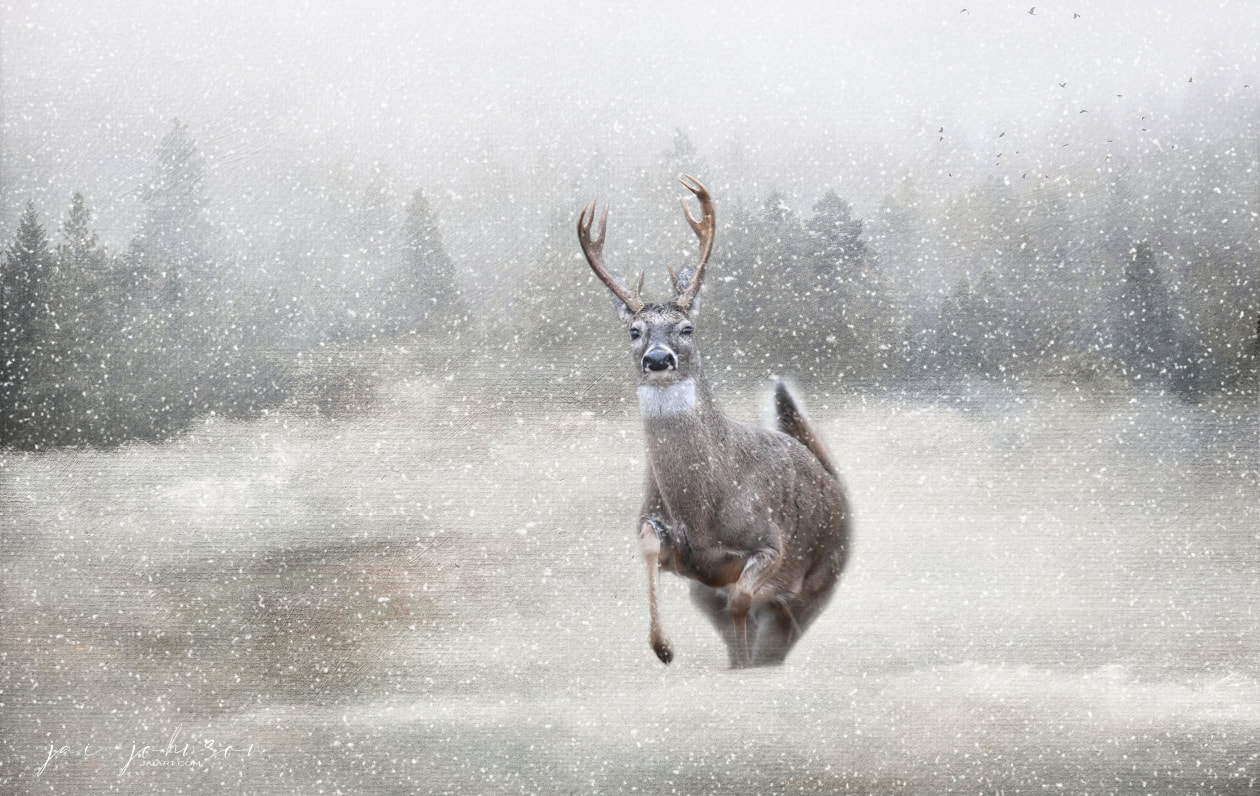
*I took this photo of this White Tailed Deer in freezing temperatures, handholding 1000mm, with wind gusts of almost 20mph. If that's not winter, I don't know what is! I decided this guy needed to be in a winter scene, with snow. The Winter Wonderland Collection was the perfect choice to create this art. Background #2 worked well, and the addition of more snow on top just added that extra-special something. I had to make sure to darken the bottom of his legs and underside a bit after blending him with the background. The burn brush worked well for this. I was also careful to mask away some of the snowflakes which made their way over his eyes on the top snow layer. And I also masked snow flakes off his underside -- snow will fall on TOP OF, and AROUND your subject...it won't be falling up under the belly. That's just a little tip to make things look as genuine as possible when placing an animal into a winter scene like this. |
Ingredients to Create This Art:
Winter Wonderland, Background #10 Winter 1 Collection, #20 plus Jumbo Snow Overlay |
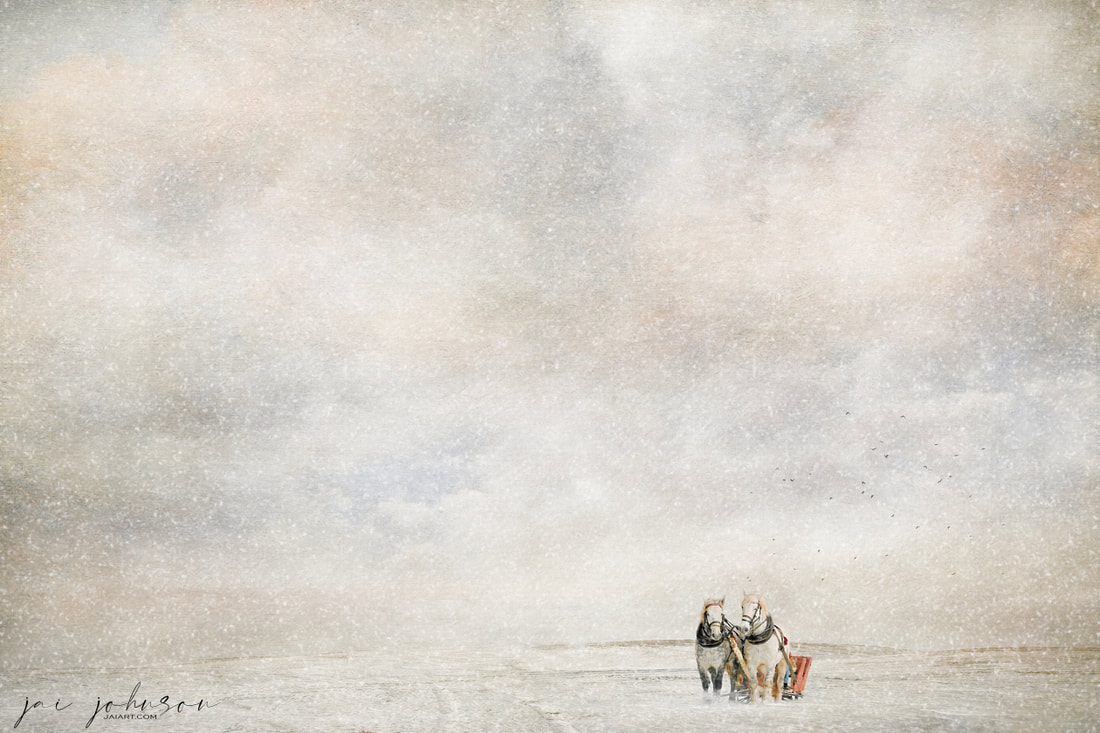
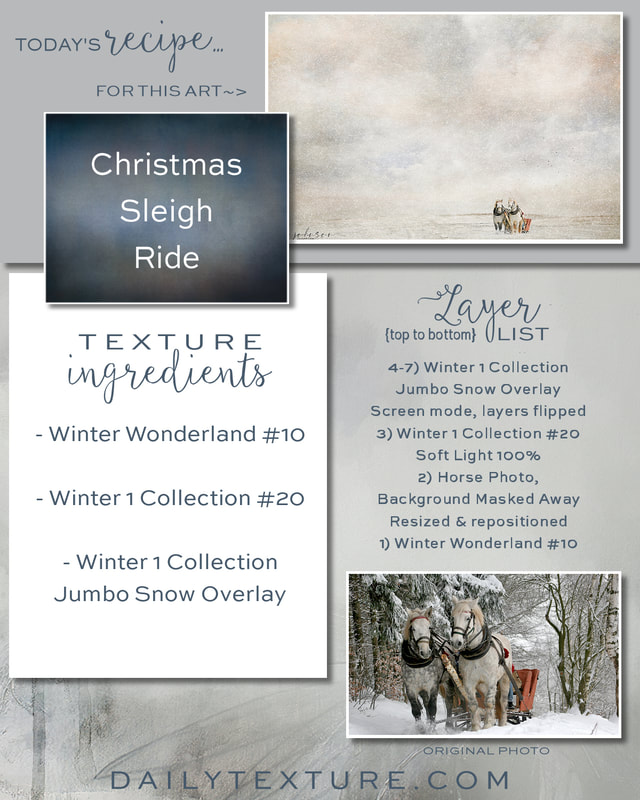
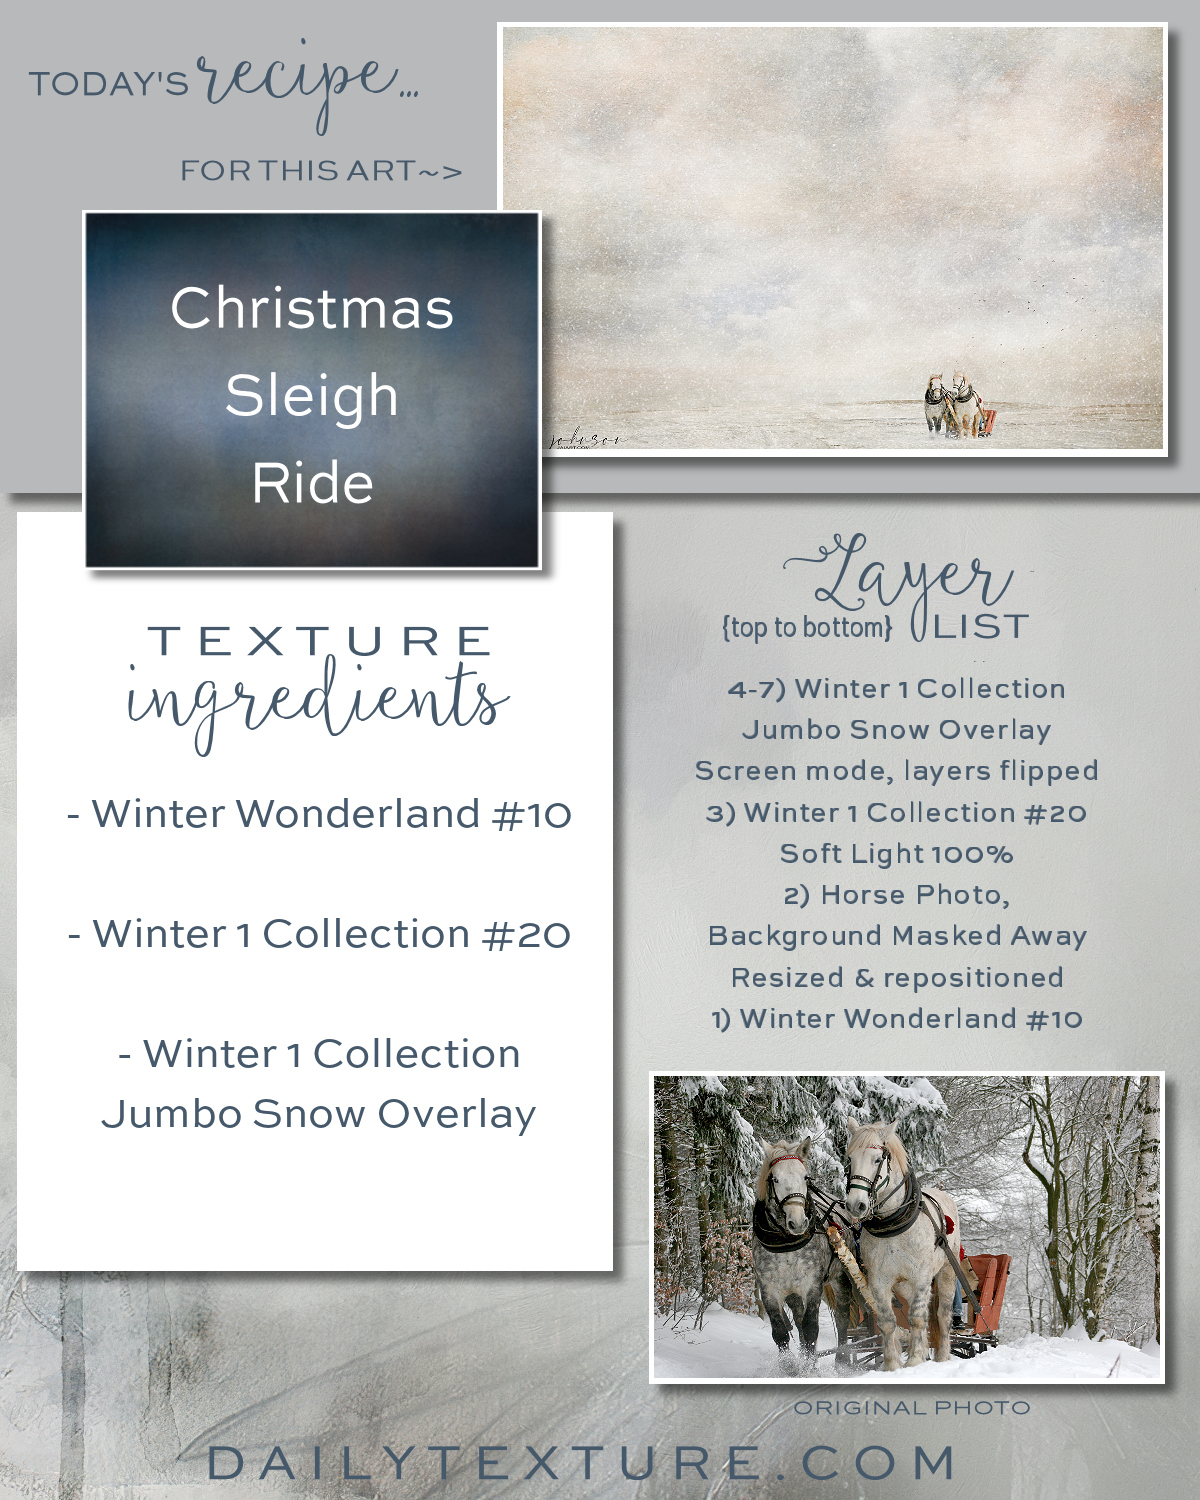
"Christmas Sleigh Ride"
Be sure to save/print the recipe image for this art, and note what I did with the snow layers...
*The sleigh ride photo was great as is, but I had a different vision, with a more minimalistic look, and not quite so up close and personal. The Winter Wonderland Collection, background #10, was the perfect way to help me achieve my vision! Adding the Winter 1 Collection #20 on top in soft light mode brightened everything up. And finally, I added multiple versions of the jumbo snow overlay from that same collection, but I flipped the layers each time I added the layer again. I flipped them from right to left, and from top to bottom, to fill this art with a lot of snow. In the end, I took the merged image into Topaz Impression and used the oil glaze filter to give the image a soft, oil painted look with a lovely old masters glow. |
Ingredients To Create This Art:
Shiloh Clouds Collection, background #19 Illumination Collection, texture #13 |
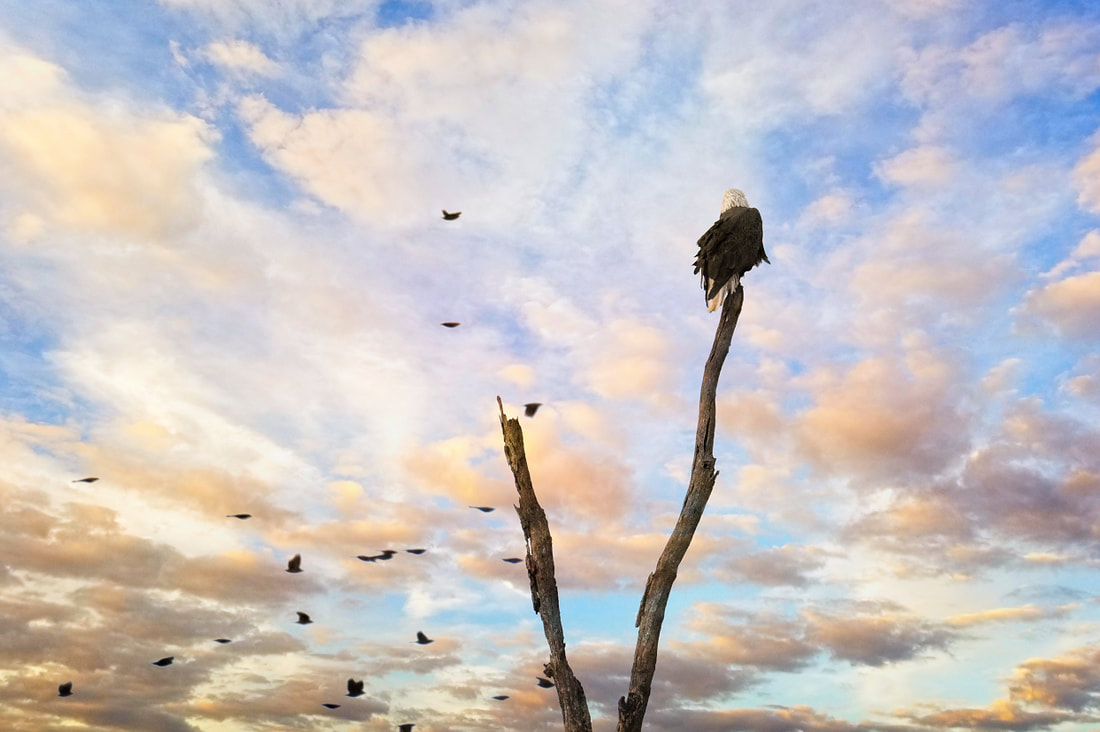
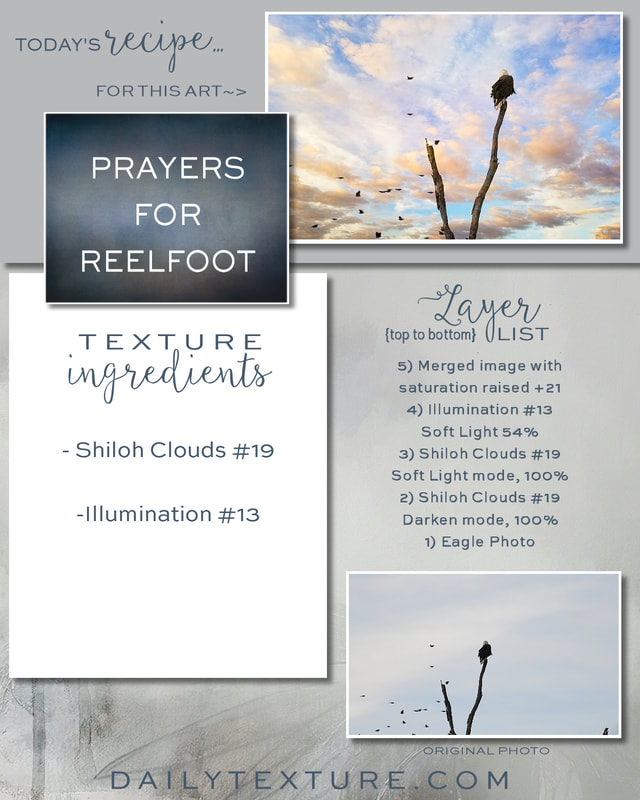
"Prayers for Reelfoot"
Be sure to save/print the recipe image for this art.
*A community I visit to photograph eagles has been devastated by the huge tornado which traveled across four states on Friday, December 10th. It's very upsetting to me, to know that this beautiful area has been destroyed, but I know, at some point, it will reclaim its beauty. One of the ways I process such events is to simply create a piece of art, because I like to share my thoughts and emotions through my creations. That is how this image was born. I've titled it "Prayers for Reelfoot", because this is an area I am personally familiar with and visit frequently. But in reality, my heart breaks for all the areas affected by this horrible storm. Those who have lost lives, the families left behind, the loss of homes....and all right here at Christmas, it's truly heartbreaking. My prayers are with them all! |
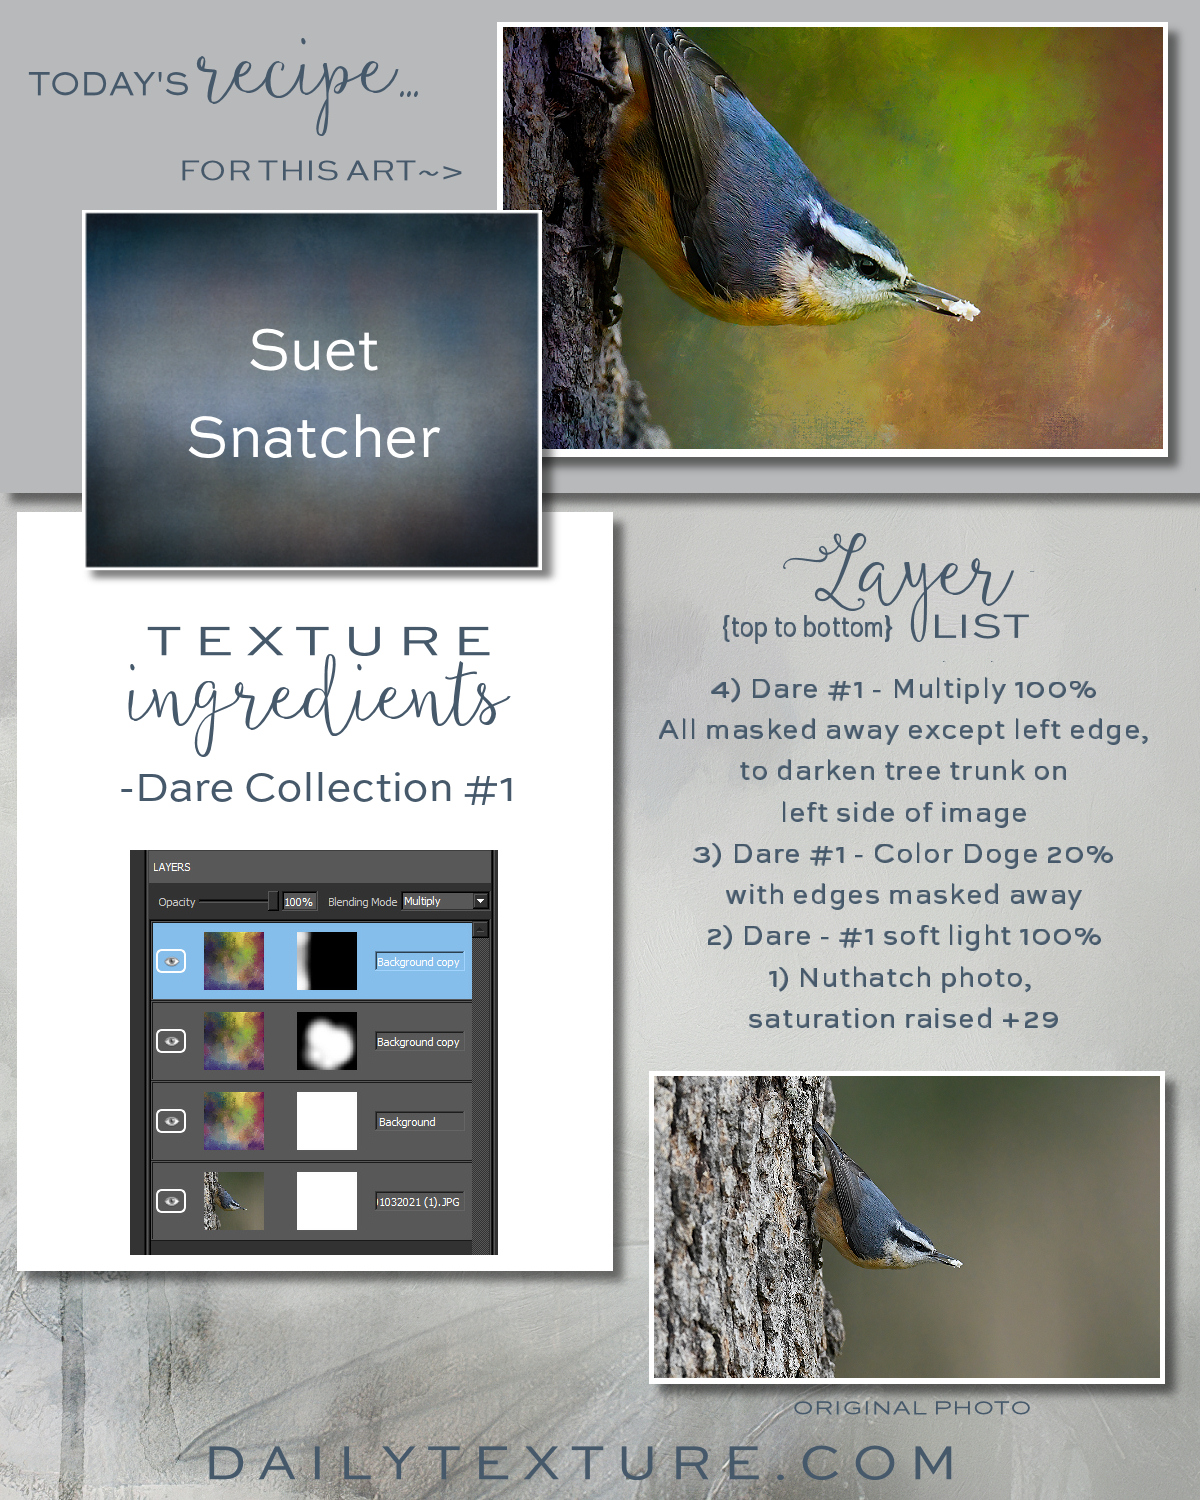
Ingredients to create this art:
The Dare Collection, Texture #1 Nuthatch Stock Photo From My Website Here P.S. Yes, I know Color DODGE is spelled wrong on the sheet above...what can I say, not enough coffee? :)
|
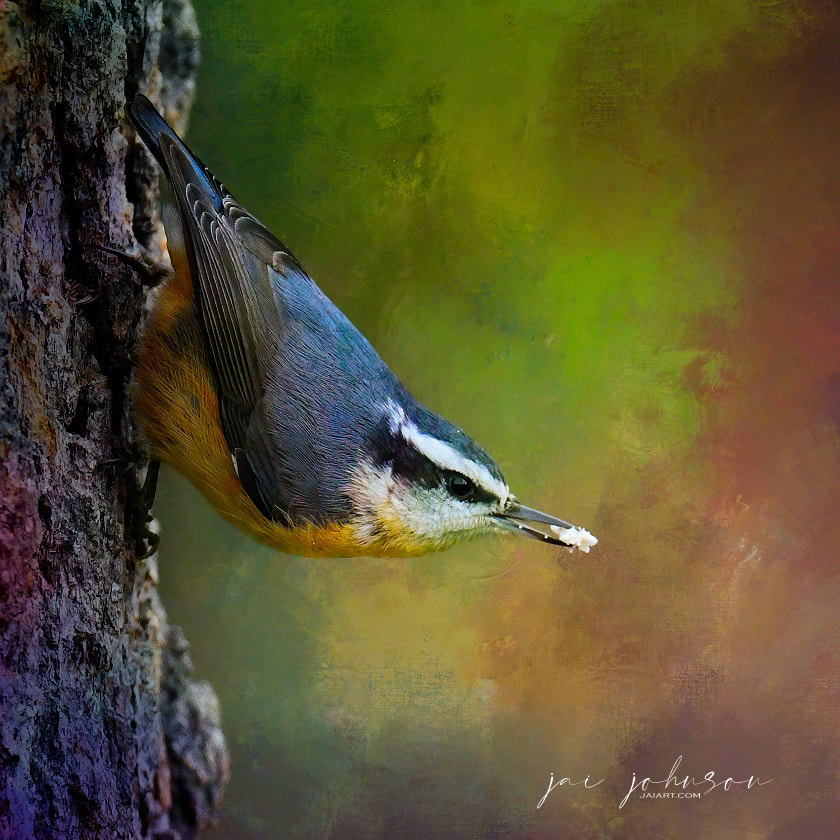
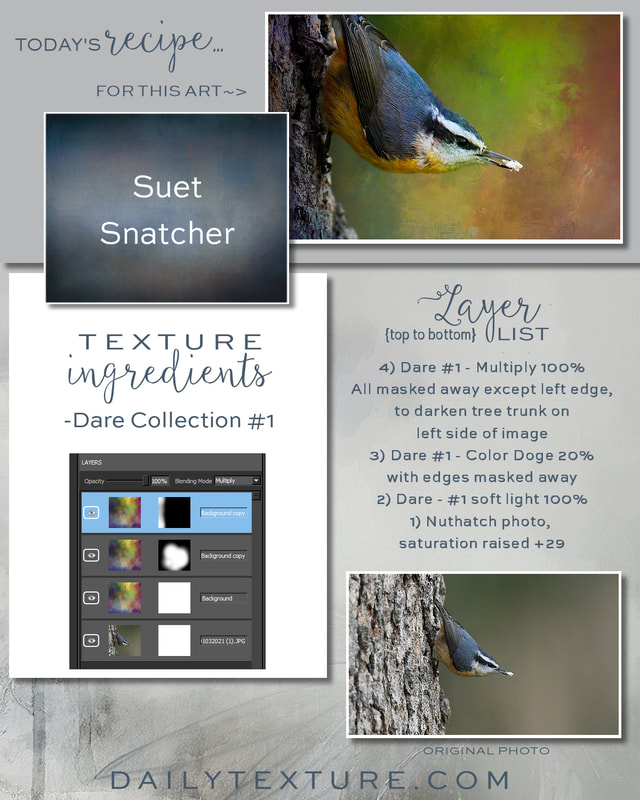
"Suet Snatcher"
Be sure to save/print the recipe image for this art, and note what I did with saturation on the bird photo layer...
*Working with brilliant, bold color scares people sometimes. It does require a bit of stepping outside your comfort zone! I often work with the bolder color when painting a photo, but it's also possible to use bolder colors with a straight photo. In this case, I started with a subject which had a bit of color anyway...the colors just needed a bit of boosting. So I raised the saturation on the bird photo, to really bring out the blues and oranges. This step makes it easier to blend with these bolder textures in this collection. The Dare Texture #1 had some green in it, which would tie in with the newly saturated green on the photo. I only used one texture to create this art, and I used it multiple times in different layer modes on top. On the recipe sheet, I've included a screenshot of my layers panel, so you can see the masking I did on the texture layers as well. |
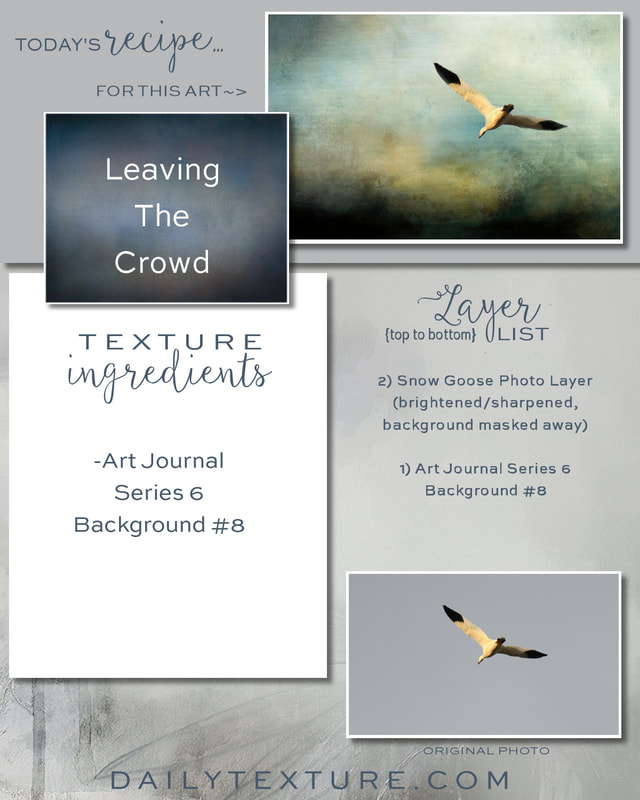
Only one texture was used to turn this gray sky bird image into a work of art...
Art Journal Series 6 Collection, Background #8 |

"Leaving The Crowd"
Be sure to save/print the recipe image for this art, and see below and in comments for something additional I did...
*A few days ago, a flock of snow geese unexpectedly flew over at sunset. Of course I grabbed a few photos of the flock. But then there was this one random bird who flew away from the group, toward the setting sun. My immediate thought was "Good for that bird, NOT following the crowd!" There's a story in this. It was fairly simple to turn this into a story, visually. All this one bird needed was a great background, and a fitting title. The recipe for this one is very simple, but you can see from the recipe the transformation...all from a random goose photo shot quite by accident. |
|
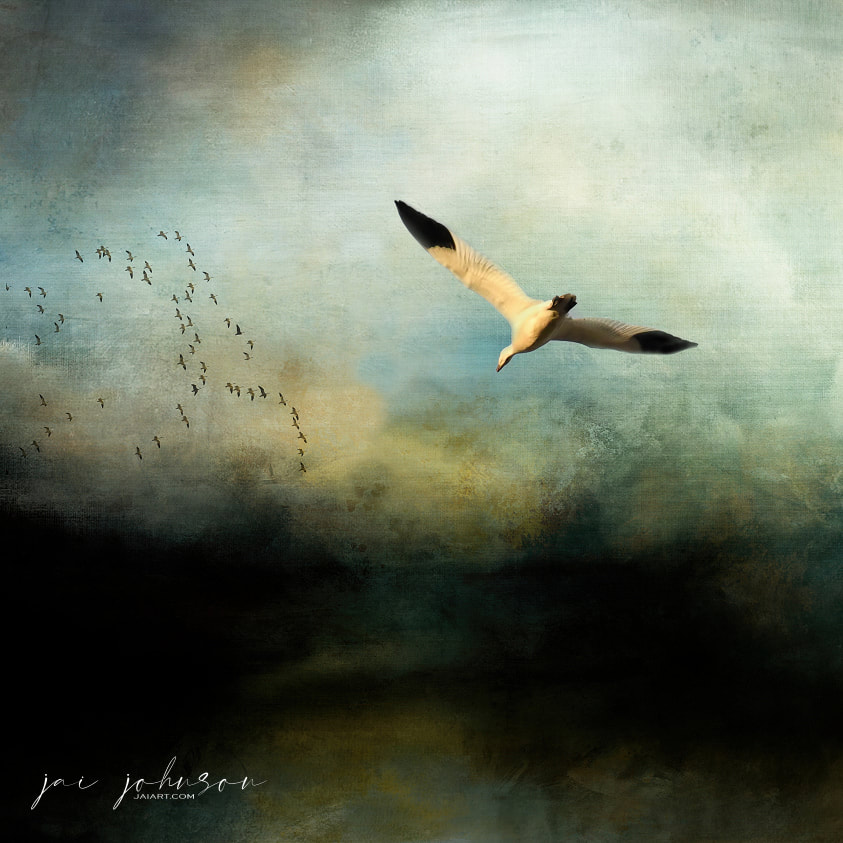
After I made this image, I remembered the entire flock I originally shot. And I wondered what it would look like if I added them in. So I saved the first image, then brought in the flock as a new layer on top. I raised the exposure of that layer to +2.46, which essentially blew out that gray sky. Then I set the layer to multiply, and re-sized the layer down to place the flock of birds further in the distance. I scooted that layer around to place them where I wanted. And suddenly, another story was born...a whole different concept...as now this one snow goose was FOLLOWING the crowd, instead of LEAVING the crowd. So I saved that image, too.
Both images tell a different story. All with one background, and simple placement of the birds. This just shows how multiple stories can come from how you, as the artist, dream them up...all from one photo shoot! |
|
|
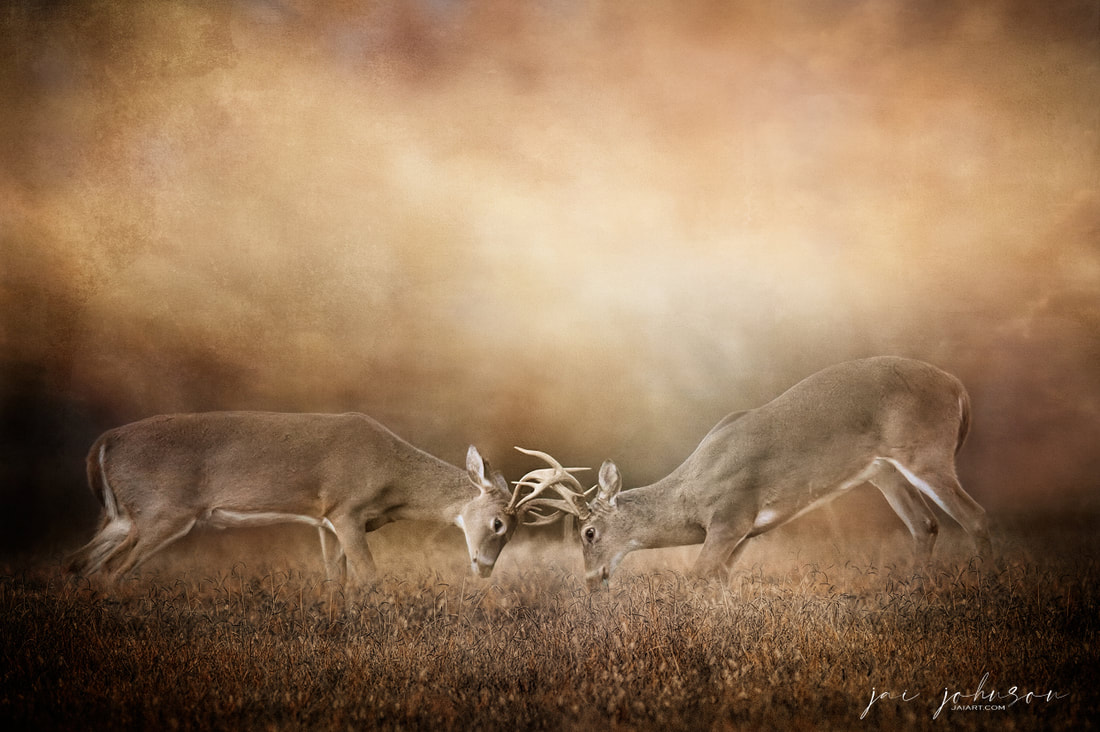
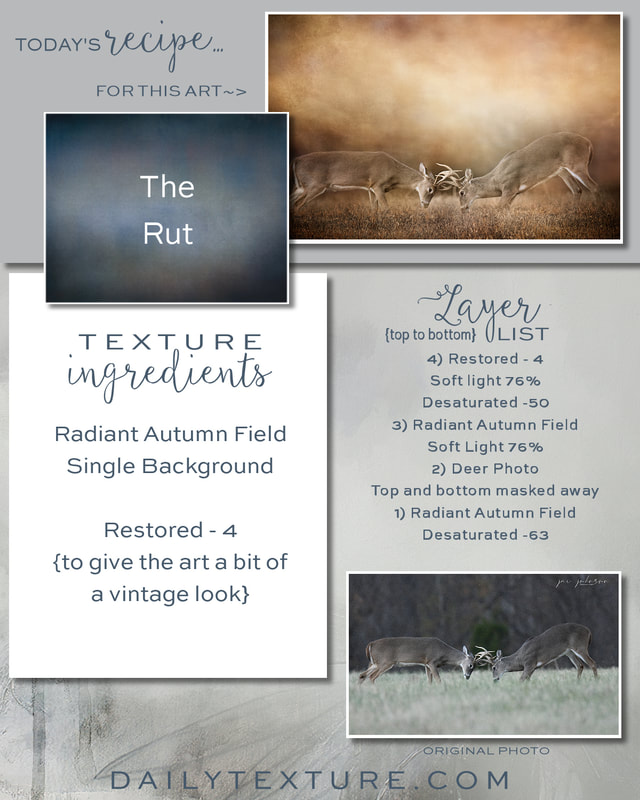
"The Rut"
Be sure to save/print the recipe image for this art, and note what I did with desaturation...
*The Radiant Autumn Field background I chose to use with this deer photo was very rich in color. Rather than fight with masking all around the deer horns, and having such an extreme color tone difference between the deer and the background, I decided to desaturate the Radiant Autumn Field background. This brought the field background tones more in line with the deer photo tones. However, I still wanted the golden glow, so I added Radiant Autumn Field on top in soft light mode as well. Then I decided to go for a more vintage feel, which is where using the Restored Collection comes into play. I also desaturated that layer to keep the tones in line. By adding the Restored texture on top, it gave the art some interesting worn looks and an older feel, as well as placed more light directly on the faces of the bucks. |
|
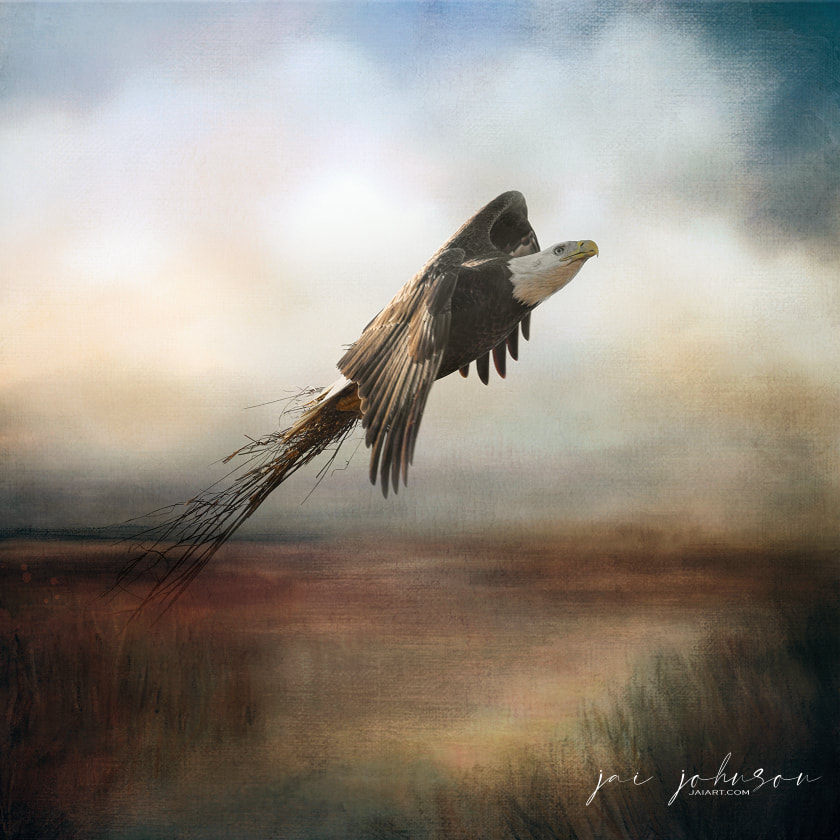
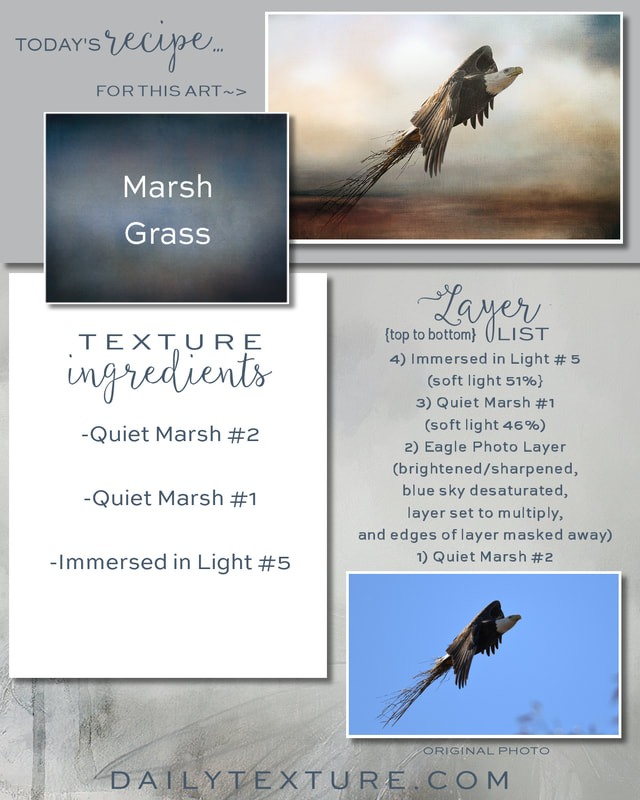
"Marsh Grass"
Be sure to save/print the recipe image for this art, and note what I did on the eagle layer...
*I prefer to shoot these birds against white/gray skies, because it's easier to blend the image with the backgrounds without doing a ton of masking. In this case, the sky was rich blue, so I had to desaturate the blue color before working. Once I got the sky gray, it was easy for the eagle to "appear" right over the background when setting his layer to multiply. If you leave the blue tones in and do this, the background will turn blue color as well. Therefore I desaturate all my blue sky photos when I want to use multiply layer mode and do less masking.* |
|
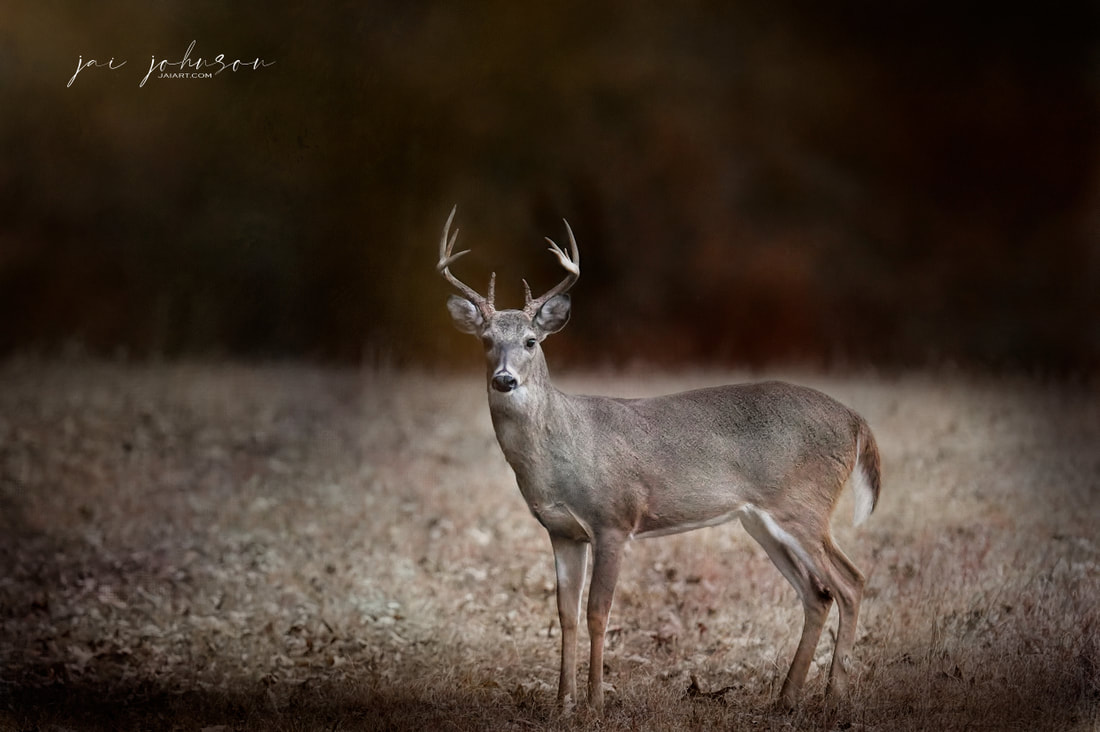
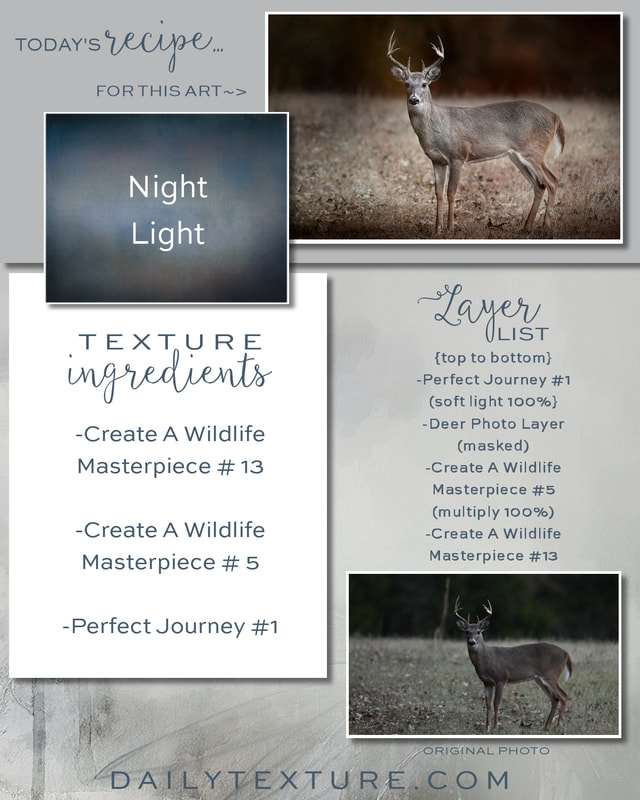
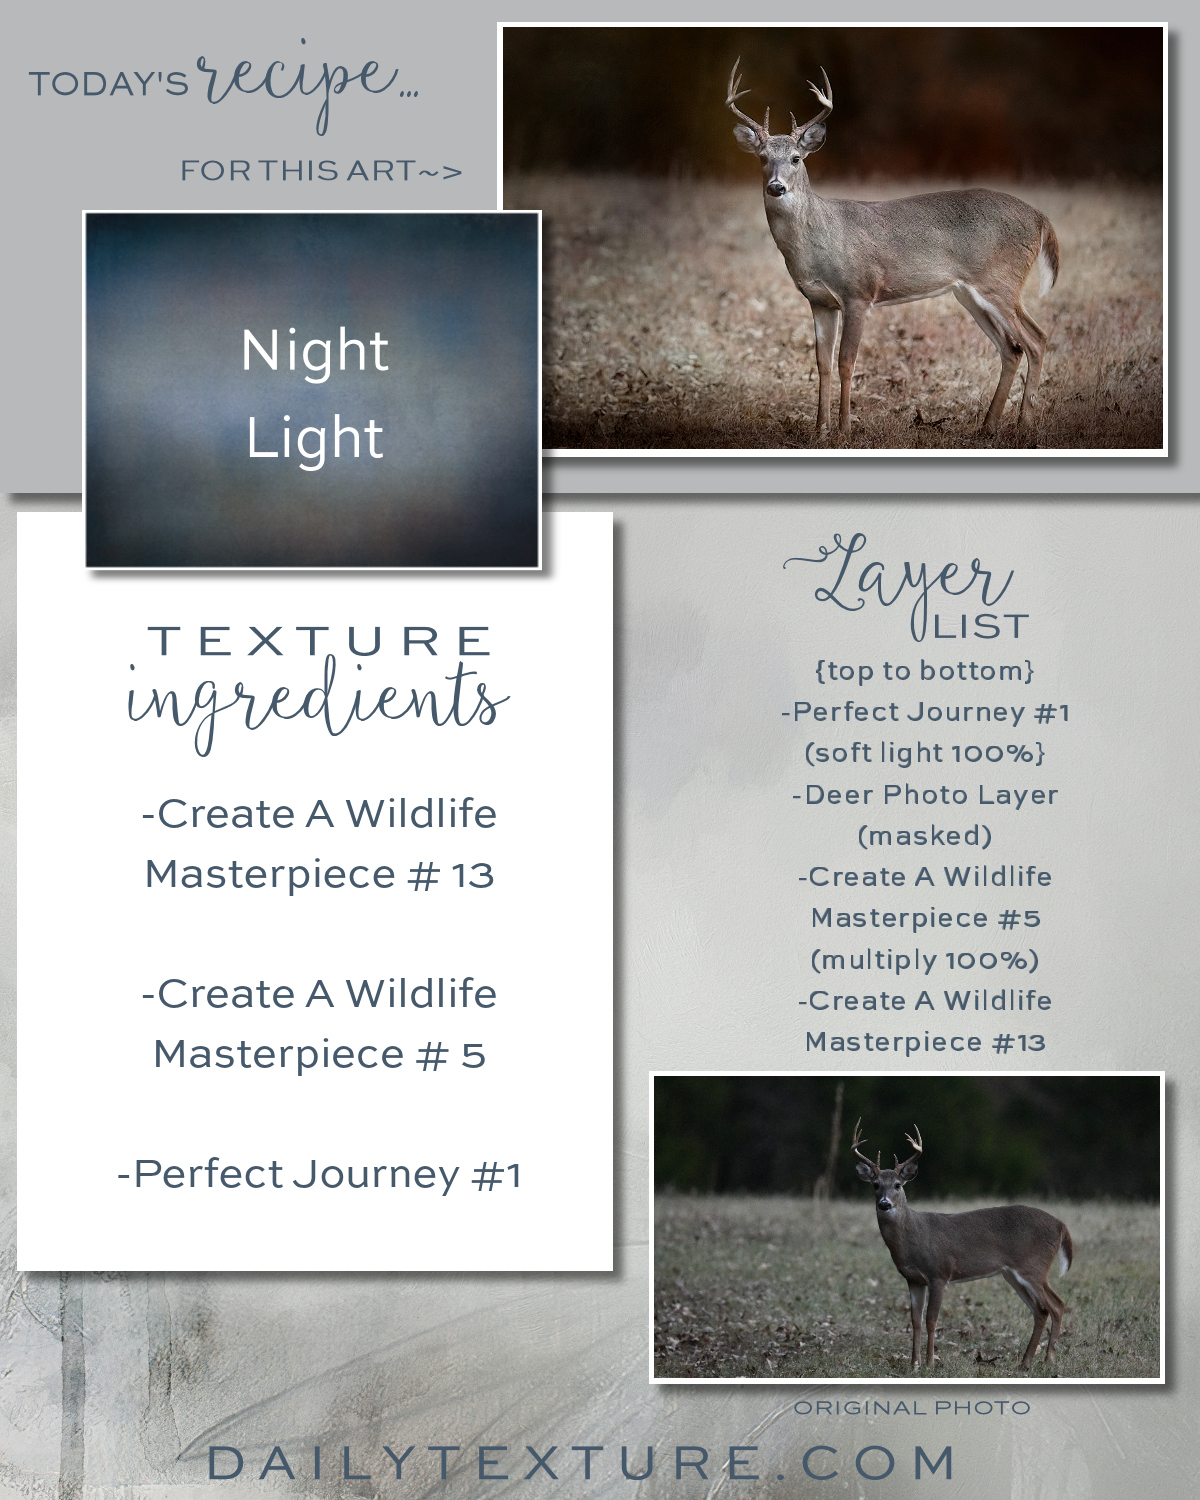
"Night Light"
Be sure to save/print the recipe image for this art, in case you wish to try something similar!
Collections Used: Create A Wildlife Masterpiece Collection Perfect Journey Collection |