|
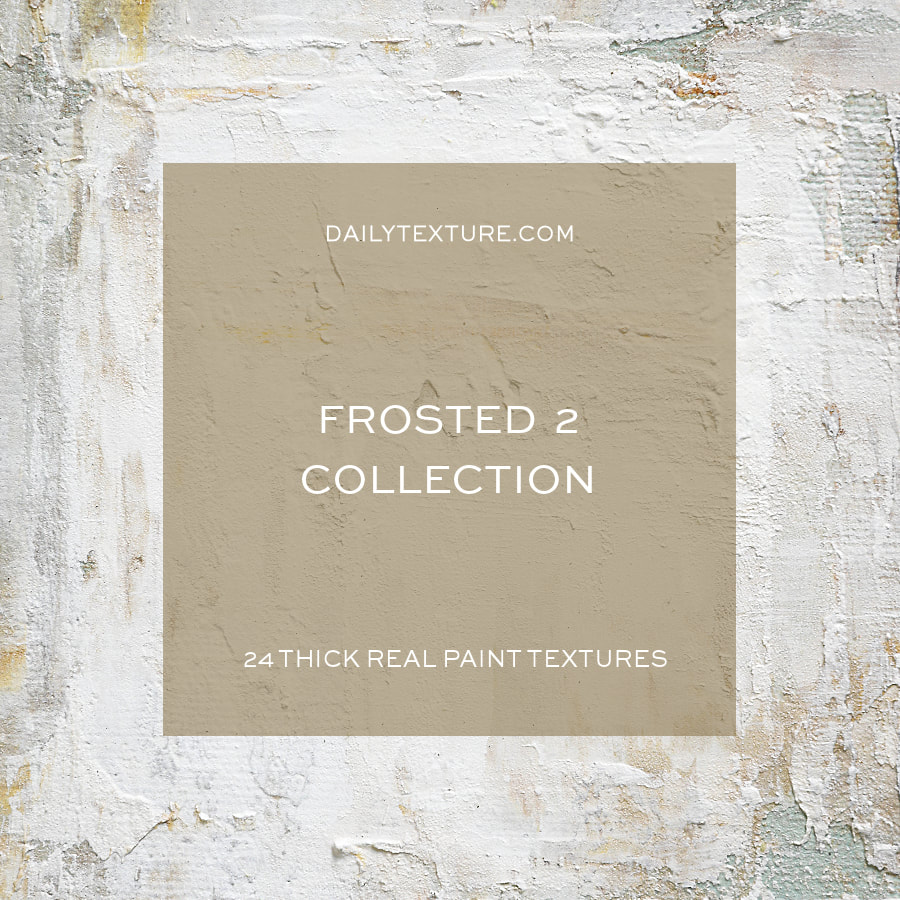
One thing I love to do when I'm feeling a lack of creativity is to build a new background from existing backgrounds. Of course, the backgrounds I create are always ready for you to blend with your photos and digital paintings right "out of the box" - it makes it super easy for you to create new works of art quickly. Sometimes I don't know WHAT I want to create, however, and I feel a bit stuck. I may have a color or texture or some vague vision in mind, but just don't know where to go. This is when I do a short creative exercise to build a new background. I usually start by opening up two texture sets and choosing two different textures. Bringing them into my photo editing software, I will then begin to work on layering and blending the two choices. In the example below, I chose one of the Frosted 2 textures and one of the Spectrum Purple textures to work with. I felt like I wanted to so something with some heavy texture, and the Frosted 2 collection is full of heavy texture. But purple and lavender colors have been on my mind, because I have some purple flowers growing here. This is what I came up with: 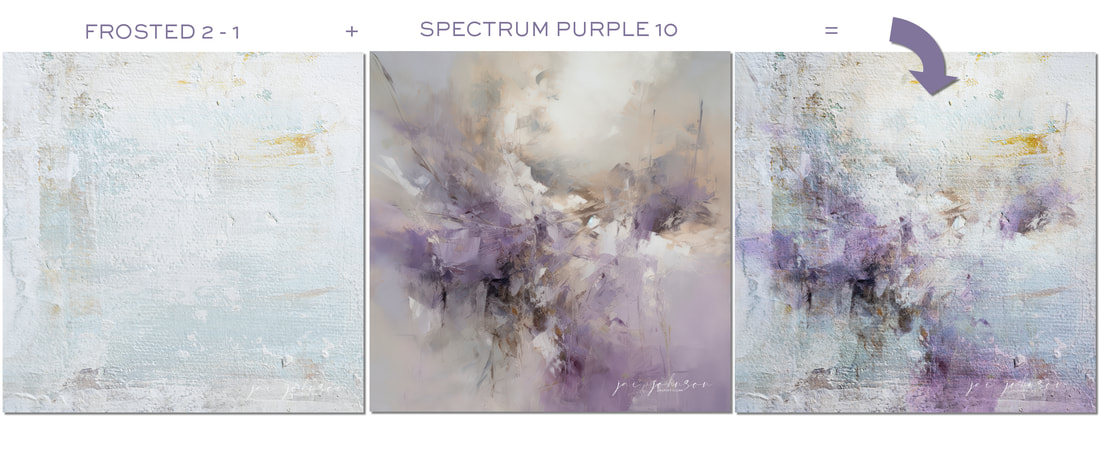 Here's a rundown on my layers list for the above, from top to bottom: Layer 5 - Frosted 2 (1) - Soft Light layer mode @ 50% Layer 4 - Frosted 2 (1) - Multiply layer mode @ 100% Layer 3 - Spectrum Purple 10 - Hard Light layer mode @ 100% Layer 2 - Spectrum Purple 10 - Multiply layer mode @ 30% Layer 1 - Frosted 2 (1) - Normal layer mode, full opacity. Here's a closer look at the new background texture I've created, which I can now blend with anything I wish: 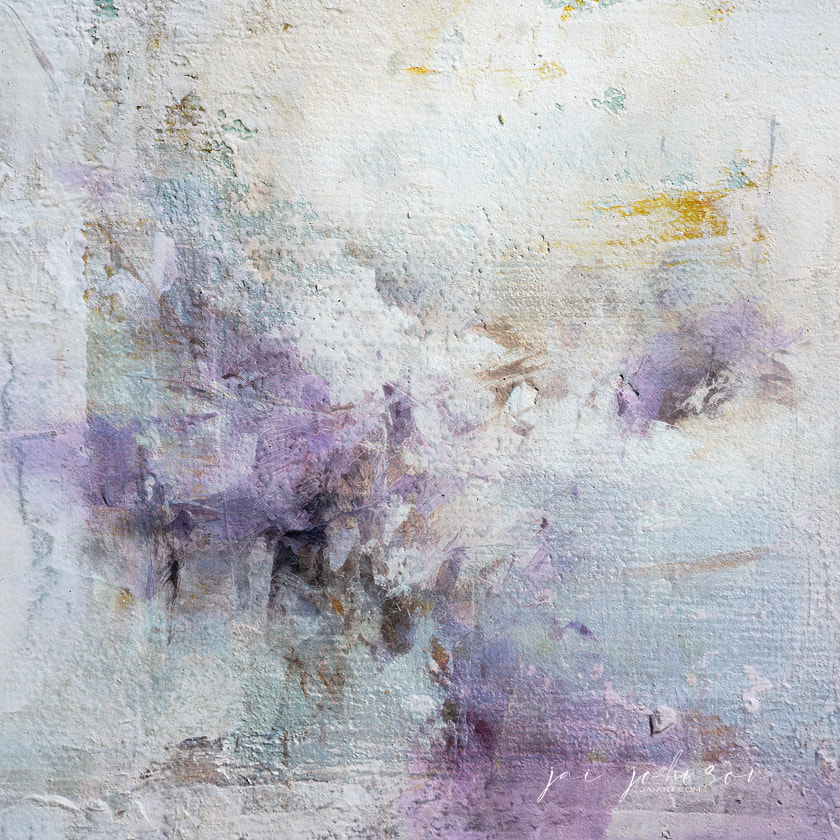 Blending some of your purchased backgrounds together can be a great way to create a unique and personalized design. It allows you to combine your own artistic style and vision with the versatility and complexity of the texture backgrounds, as well as creative something a little different only you may think of. Here are the steps for blending your backgrounds together to create a new design: Step 1: Choose Your Backgrounds Choose the painted backgrounds that you want to blend together. Look for backgrounds that have complementary colors, textures, and styles. This will help you create a cohesive and visually appealing design. Step 2: Overlay the Backgrounds Once you have chosen your backgrounds, overlay them in your design software. Position the second background on top of the first background. Adjust the opacity and/or layer mode of the second layer until you can see both backgrounds together. Repeat this step for each background that you want to blend together. Step 3: Adjust the Blend Mode Adjust the blend mode of each layer until you find what works well with your vision. Experiment with different blend modes to achieve the desired effect. You can also adjust the opacity of the top layers to fine-tune the blending. Step 4: Refine the Blending Use layer masks to refine the blending of the painted backgrounds. You can use the layer masks to hide or reveal parts of a top layer. This will allow you to blend the two textures together seamlessly and create a new design that is unique to you. Step 5: Repeat the Process If you want to add more backgrounds to your design, simply repeat the process. Overlay the third background on top of the first two, adjust the blend mode, and refine the blending. You can repeat this process as many times as you like until you achieve the desired result. Blending your own painted backgrounds together to create a new design is a great exercise to get your creative juices flowing! It allows you to experiment with different colors, textures, and techniques to create a unique and personalized design. By overlaying the backgrounds, adjusting the blend modes, and refining the blending if needed, you can create a new design that is different from using your backgrounds "straight out of the box". So, go ahead and experiment with blending your backgrounds to create something new and exciting, exclusive to you! P.S. Be sure to SAVE your new background with a new name, so you can use it again in the future for your artistic projects! Collections Used:
Comments are closed.
|

Be sure to join the Daily Texture Mailing list to keep up to date on new collections!
You may find these two links useful: • Frequently Asked Questions • Helpful Links and Information  In most of my videos, I use older software which I've used for years. Unfortunately, the software I use isn't being sold anymore.
Many of you have asked me to teach in Photoshop -- but I am just learning myself in that software. In my learning, I have discovered the best Photoshop training on the planet, and I have secured a special offer on this same training JUST FOR YOU! Click the button below to learn from my same trainer, and to save a HUGE amount on this lifetime access course: Please note: Some collections shown in older blog posts have been retired and are no longer available. The blog posts have been left for you to view for learning purposes and examples of what can be done using the Daily Texture resources. As always, for the most current available collections, please visit the store here.
Archives
April 2024
|

 RSS Feed