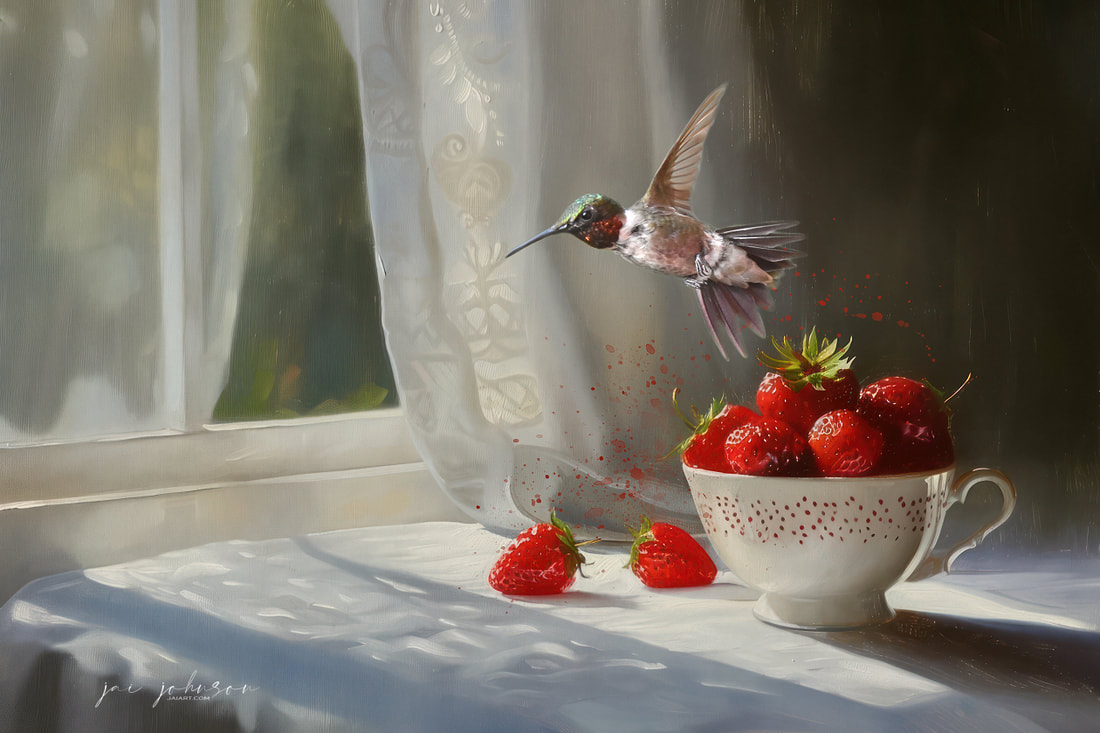
 Strawberry Splash, Created With The Savory Collection and splashes from the Luminous Watercolor Collection Welcome to my world of photo art, where creativity knows no bounds and imagination takes flight! As an avid lover of wildlife and nature, I've found my passion in crafting a variety of scenes through digital artistry. In this blog post, I'll share with you 20 reasons why I'm deeply enamored with creating photo art. From the freedom to explore endless possibilities to the therapeutic nature of the process, each reason encapsulates the joy and fulfillment I derive from this unique art form. Join me on this journey as we delve into the world of photo artistry and uncover the myriad reasons behind my love for it! 1) Endless Creativity: With photo art, I can explore limitless possibilities and create scenes which defy reality.
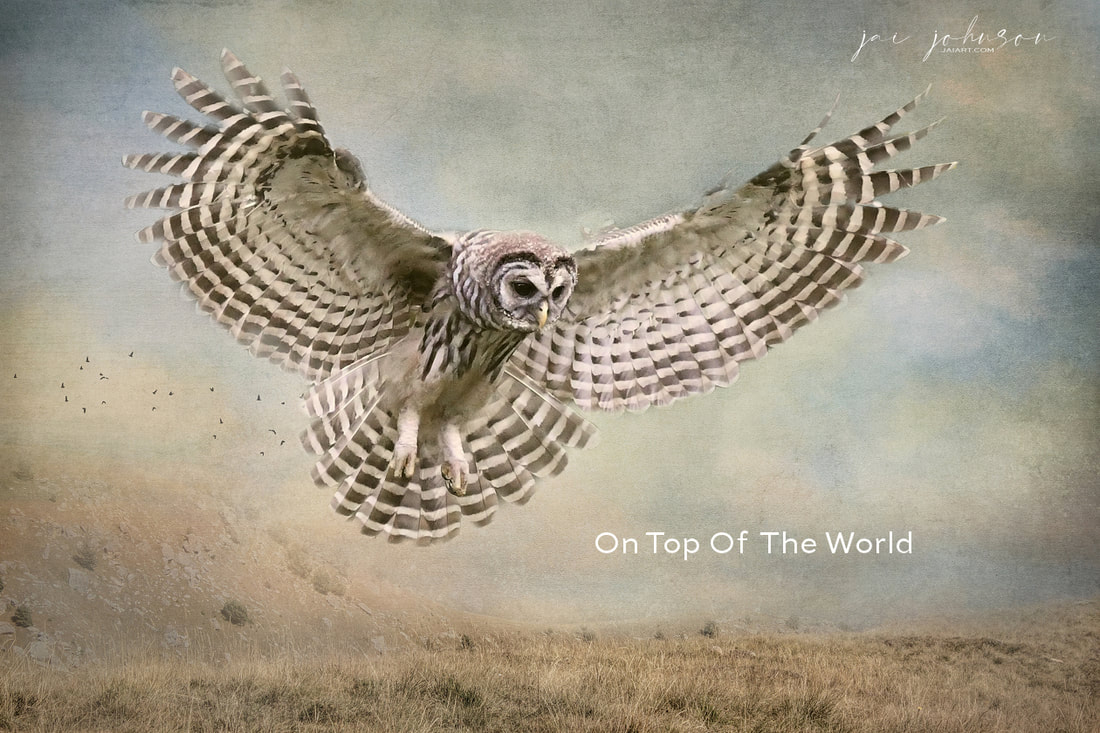
2) Fast and Efficient: Unlike traditional art methods, photo art allows me to work quickly and efficiently, saving valuable time. 3) Space-Saving: Since I work digitally, I don't need a large studio space to create my art. All I need is my computer! 4) Cost-Effective: Photo art eliminates the need to purchase expensive art supplies, making it a more affordable option for creating stunning visuals. 5) Chemical-Free: As someone sensitive to chemicals in art supplies, photo art provides a safe and non-toxic alternative for expressing my creativity. 6) Versatility: Using the variety of Daily Texture backgrounds and texture offerings, I can easily manipulate images to create different moods and atmospheres, from dramatic to whimsical. 7) Precision: With digital tools, I have precise control over every detail, allowing me to achieve the exact look I envision. 8) Accessibility: Anyone with a computer and basic software can try their hand at photo art, democratizing the art form. 9) Experimentation: Photo art allows me to experiment with different techniques and styles without fear of ruining materials. 10) Adaptability: I can easily adjust and refine my artwork based on feedback or my personal preferences. 11) Emotional Expression: I can convey complex emotions and narratives through my artwork, evoking powerful responses from viewers. 12) Eco-Friendly: By working digitally, I reduce my environmental footprint by minimizing waste and pollution associated with traditional art supplies. 13) Learning Opportunities: Photo art constantly presents new challenges and opportunities for growth, keeping me engaged and motivated to improve my skills. 14) Customization: I can tailor my artwork to fit specific client preferences or project requirements, providing a personalized touch. 15) Portability: With digital files, my artwork can be easily shared, printed, and displayed in various formats and sizes. 16) Preservation: Digital artwork can be archived and preserved indefinitely, ensuring its longevity for future generations to enjoy. 17) Storytelling: Photo art allows me to narrate compelling stories through imagery, capturing moments that resonate with viewers on a deeper level. 18) Therapeutic: Engaging in photo art serves as a therapeutic outlet, providing a calming and meditative experience as I immerse myself in the creative process. 19) Innovation: I enjoy pushing the boundaries of traditional photography and art by blending techniques and mediums to create innovative and unique compositions. 20) Joy of Creation: Ultimately, I love creating photo art because it brings me immense joy and satisfaction to see my visions come to life in stunning visual form. Thank you for joining me on this exploration of my passion for photo art. I hope these reasons have shed light on the depth of my love for this art form and perhaps inspired you to embark on your own creative journey. Let's continue to celebrate the beauty of nature and the endless possibilities of digital artistry together. Until next time, keep creating and embracing the magic of photo art!  My original photo from one of my solitary outings. I spent many days/hours with this juvenile barred owl, and was able to learn his behavior and "get to know him", so to speak. I don't think that would have been possible in a social environment. Capturing the beauty of the natural world through the lens of a camera is a passion that drives many photographers to explore the wild. In the realm of wildlife photography, one often faces the choice between solitude and social interaction. Should wildlife photography be a solitary event, with only you and the wilderness, or a social event with a group of fellow photographers? Let's delve into the pros and cons of each approach to help you find your own balance. The Solitary Experience: There's something profoundly serene about venturing into the wild alone, armed with just your camera and an unquenchable thirst for discovery. Here's why some photographers swear by the solitary experience: 1. Uninterrupted Connection with Nature: Solitary photographers argue that going it alone allows them to forge a deeper and more intimate connection with the natural world. The absence of human conversation and distraction permits you to become one with your surroundings. You'll find yourself attuned to the subtlest of sounds, the gentlest of movements, and the changing moods of the environment. 2. Minimal Disturbance to Wildlife: Wild animals are often skittish around humans, and a solitary photographer is less likely to disturb their natural behavior. The quiet and solitary presence is less intimidating, enabling you to capture more authentic moments in the lives of your subjects. 3. Creative Freedom: Being alone means you have complete creative control. You can choose your shooting schedule, locations, and experiment with different techniques without external influences. This autonomy can lead to unique and personal wildlife photography. The Social Gathering: On the flip side, many photographers thrive in a social wildlife photography setting, where they can share knowledge, collaborate, and experience the joys and challenges of nature with like-minded individuals: 1. Shared Knowledge: One of the greatest benefits of a group setting is the opportunity to exchange knowledge and experiences. Photographers can share tips, techniques, and information about wildlife behavior. Learning from others can significantly enhance your own skills. 2. Safety in Numbers: Venturing into remote or potentially hazardous environments can be risky. In a group, there's safety in numbers. If something goes wrong, there are others to assist and ensure everyone's well-being. 3. Collaborative Potential: Collaboration among photographers can lead to incredible results. Different perspectives, angles, and creative ideas can result in unique and breathtaking shots that might not be achievable alone. Finding Your Balance: So, which approach is right for you? The answer depends on your personal preferences, your goals as a wildlife photographer, and the specific circumstances of each photography outing. Some photographers find that a mix of both approaches works best. They relish the solitude when seeking a personal connection with nature and embrace social gatherings to learn, collaborate, and share in the joy of capturing nature's wonders. Ultimately, regardless of whether you choose a solitary or social approach to wildlife photography, it's crucial to prioritize the well-being of the wildlife you're photographing. Always follow ethical guidelines to minimize disturbance and protect the subjects of your art. In the end, the most important thing is to find the balance that allows you to connect with nature, create stunning photographs, and share your passion with others who share your love for the wild. 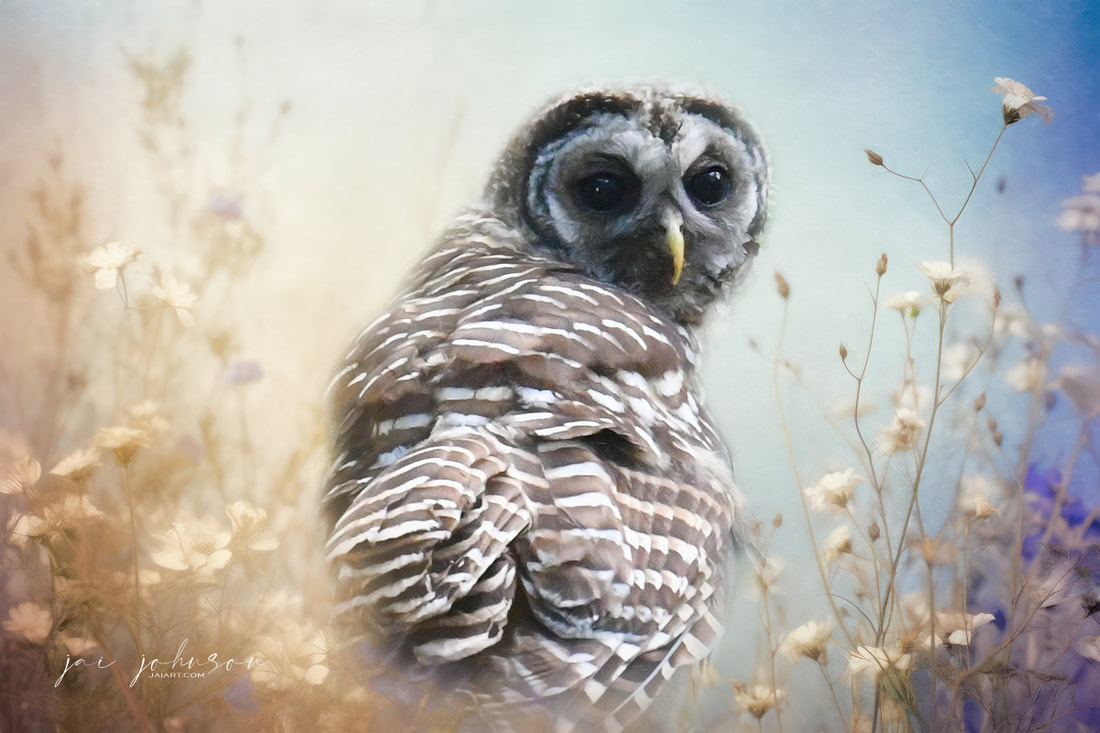 My photo above was blended with the Wisps of Nature Collection to create this art.  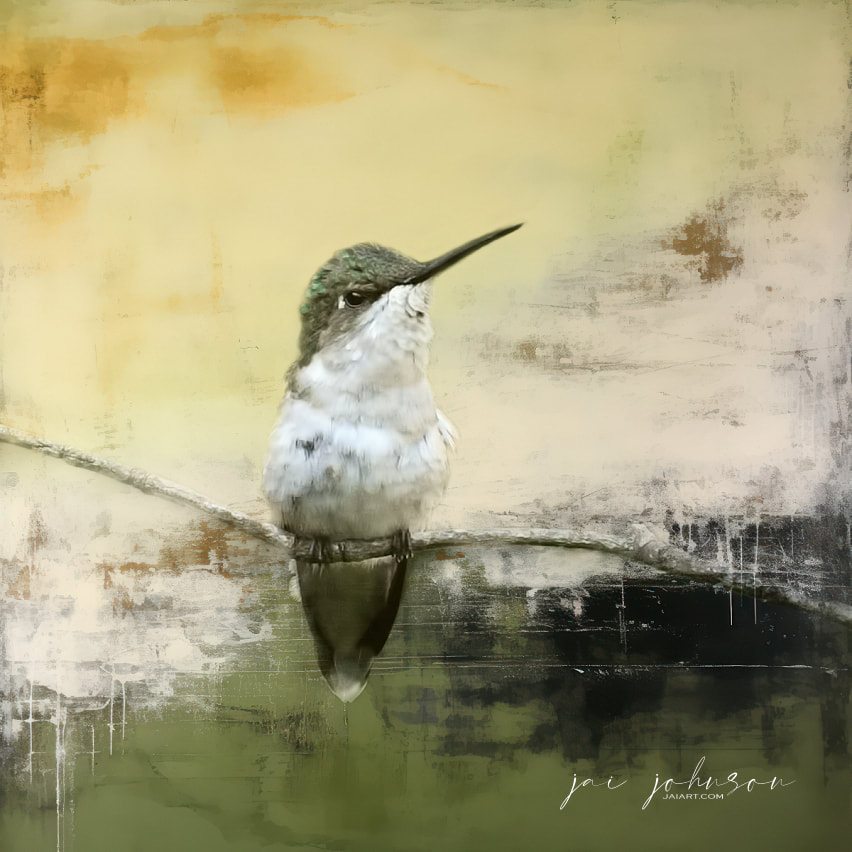 In the realm of creative pursuits, it's not uncommon for artists, photographers, and enthusiasts to experience ebbs and flows in their passion for their craft. Life's demands, changes in priorities, and personal challenges can sometimes cause even the most ardent creatives to temporarily lose sight of their artistic passions. If you feel you've lost your passion, fear not! Here's some tips of things I do, and you can do too, to reignite the passion for your craft: 1. Reflect on Your Journey: Take some time to look back on your artistic journey. Reminisce about the moments when you felt the most alive and connected to your art. What aspects of your photo art used to excite you? By revisiting your past experiences, you can identify the triggers that ignited your passion in the first place. 2. Reconnect with Your Why: Ask yourself why you started doing photo art. What emotions and motivations drove you initially? Realigning with your original purpose can help you rediscover the deep-rooted passion that might have faded over time. 3. Experiment with New Techniques: Trying new techniques with different textures and backgrounds than you've traditionally used before can bring a sense of novelty to your creative process. Learning and implementing new methods can reignite curiosity and enthusiasm, propelling you out of your creative comfort zone. 4. Step Outside Your Comfort Zone: Challenge yourself to explore subjects and themes you haven't tried before. Pushing boundaries can lead to exciting discoveries and renewed passion for your art. 5. Set Personal Challenges: Establish small, achievable goals or challenges for yourself. These could be related to completing a certain number of artworks within a specific time frame or experimenting with a particular style. Accomplishing these challenges can boost your motivation. 6. Dive into Inspiration: Surround yourself with inspiration. Browse art books, visit galleries, or explore online platforms where other artists share their work. Exposure to different forms of art can trigger new ideas and revive your creative energy. 7. Create an Inspiring Workspace: Your physical environment plays a role in your creativity. Organize and personalize your workspace to make it conducive to artistic exploration. A well-curated environment can help stimulate your imagination. 8. Embrace Playfulness: Approach your art with a playful mindset. Experiment without worrying about the outcome. Embracing the joy of exploration can help you reconnect with the childlike wonder of creating. 9. Practice Regularly: Set aside consistent time for creative practice, even if it's just for a short period each day. Regular engagement can prevent creative stagnation and gradually reignite your passion. 10. Document Your Progress: Keep a visual record of your creative journey. Documenting your progress over time can serve as a visual reminder of how far you've come, boosting your motivation to continue. 11. Embrace Failure and Learn: Don't be afraid to make mistakes or produce work that falls short of your expectations. Each misstep is an opportunity to learn and grow as an artist, and this learning process can reignite your passion. 12. Take Breaks and Rest: Artistic burnout can be a passion killer. Give yourself permission to take breaks when needed. Stepping away from your art for a short while can refresh your perspective and reignite your drive. 13. Connect with Fellow Artists: Engage with other artists through workshops, forums, or social media groups. Sharing experiences, challenges, and victories with a community of like-minded individuals can inspire and motivate you. 14. Find Personal Meaning: Connect your art to personal experiences, emotions, or stories. Infusing your work with deeper meaning can rekindle the emotional connection you have with your art. Regaining passion for your art is a deeply personal journey that requires introspection, experimentation, and patience. By taking proactive steps, exploring new avenues, and nurturing your creativity, you can overcome periods of stagnation and rediscover the joy and fulfillment that comes from creating photo art. Remember, passion is a flame that can be rekindled with the right care and attention. *The art above was created with the new Abstract Adventures bundle, which is a great set to work with your favorite subjects and renew your passion with your photo art!  Hi everyone! I've released a HUGE bundle this month, the new Abstract Adventures bundle. Below is a video showing you how I made one of my art pieces with this new set. I hope you enjoy it! :) 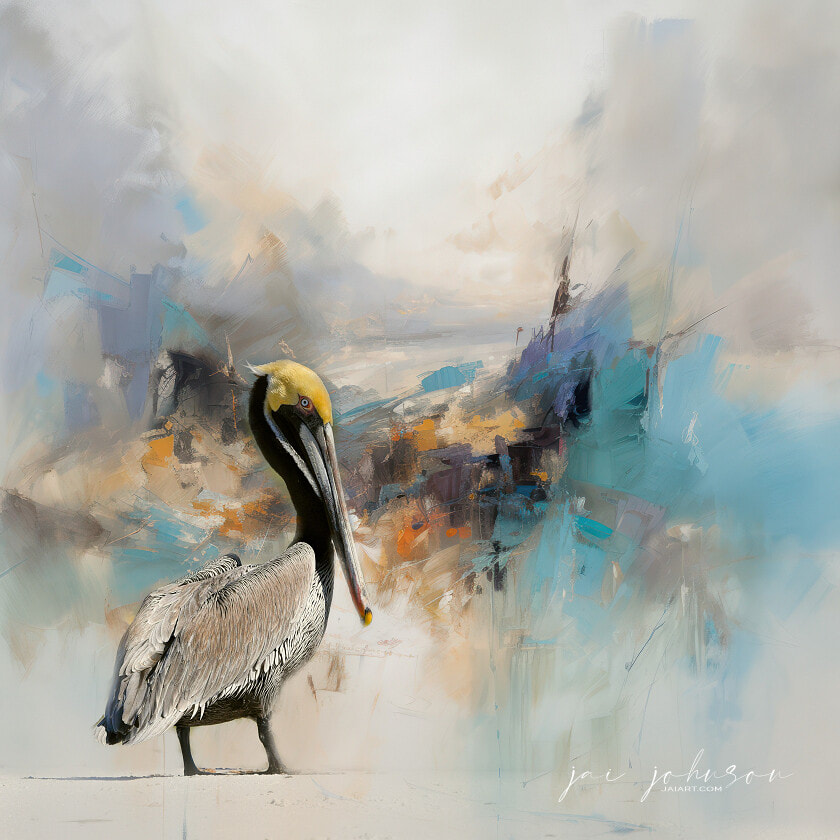 Summer is here, and what better way to celebrate the warm weather than a delightful beach vacation? Whether you're an avid photographer or just looking to capture some memorable moments, the beach offers a plethora of captivating subjects to photograph. From stunning seascapes to charming wildlife and vibrant beach activities, your camera can capture the essence of summer in every frame. In this blog post, we present 20 things you can photograph with the intention of creating memorable art from these fun subjects you see by the sea. Sunrise and sunset oceanic scenes are obvious, so this is a list in addition to those. :) 1) Waves in Motion: Experiment with different shutter speeds to capture the graceful movement of crashing waves. Freeze a wave in action or create a dreamy, long exposure effect. 2) Sand Dunes: Explore the undulating landscape of sand dunes and capture their unique shapes and textures. Play with light and shadow to enhance their natural beauty. 3) Seashells: Delve into the world of seashells by photographing their intricate patterns and delicate details. Get close and experiment with different angles to highlight their uniqueness. 4) Beach Umbrellas and Chairs: Colorful beach umbrellas and chairs provide an excellent opportunity for vibrant and playful compositions. Capture their symmetry, patterns, and contrast against the sandy backdrop. 5) Beachcombing: Photograph the treasures washed ashore, such as interesting driftwood, seaweed, or sea glass. These objects make for fascinating macro shots or still life compositions. 6) Wildlife {my personal favorite!}: Keep an eye out for seagulls, pelicans, eagles, and other coastal birds soaring through the sky. Capture their graceful flight or candid moments as they interact with the beach environment. 7) Crabs and Sandpipers: Observe tiny crabs scurrying across the sand or sandpipers darting in and out of the waves. Patience and quick reflexes will help you capture their lively movements. 8) Surfers and Bodyboarders: If you're lucky enough to spot surfers or bodyboarders catching waves, seize the opportunity to capture the exhilarating moments when they conquer the ocean. 9) Beach Sports: Volleyball, frisbee, soccer—photograph the energy and enthusiasm of people engaging in beach sports. Freeze the action or focus on the expressions of joy and camaraderie. 10) Sandcastles and Sand Sculptures: Document the imaginative creations of children and adults as they build intricate sandcastles and sculptures. Capture the pride and effort put into their creations. 11) Kites and Windsocks: Look up and capture the vibrant kites soaring high above the beach. Include the clear blue sky as a backdrop for a cheerful and lively composition. 12) Piers and Jetties: If your beach destination has piers or jetties, capture their rustic charm and the interaction between people and the structure. Experiment with different angles and perspectives. 13) Beachcombers: Capture the candid moments of people strolling along the shoreline, collecting seashells, or enjoying the tranquility of the beach. 14) Tide Pools: Explore the small pools of water left behind by the receding tide. Photograph the fascinating marine life, such as colorful sea anemones, crabs, or small fish. 15) Boats: When visiting the ocean, you'll most likely see a variety of different boats, from shrimp boats to speed boats to fishing boats to cruise ships. Boats are fascinating to photograph and add into your art, whether they be the focal point or a background element. 16) Beach Architecture: If there are any distinctive beach houses, lifeguard towers, or other architectural structures, capture their charm and character against the backdrop of the sea. 17) Beach Foliage: Pay attention to the vibrant coastal plant life, such as dune grass, palm trees, or colorful flowers. Use them as foreground elements to add depth and interest to your compositions. 18) Beach Fishing: Photograph fishermen casting their lines or reeling in their catches. Capture their focused expressions and the anticipation of a successful catch. 19) Beach Bicycles: Look for colorful beach cruisers or bicycles along the shoreline. Photograph them against the beachscape for a nostalgic and summery feel. 20) Dogs: Many people bring their dogs to the beach for a little fun! As these dogs play in the waves or run across the sand, they make for interesting and fun beach photos, and are perfect to turn into some joyful beach art! 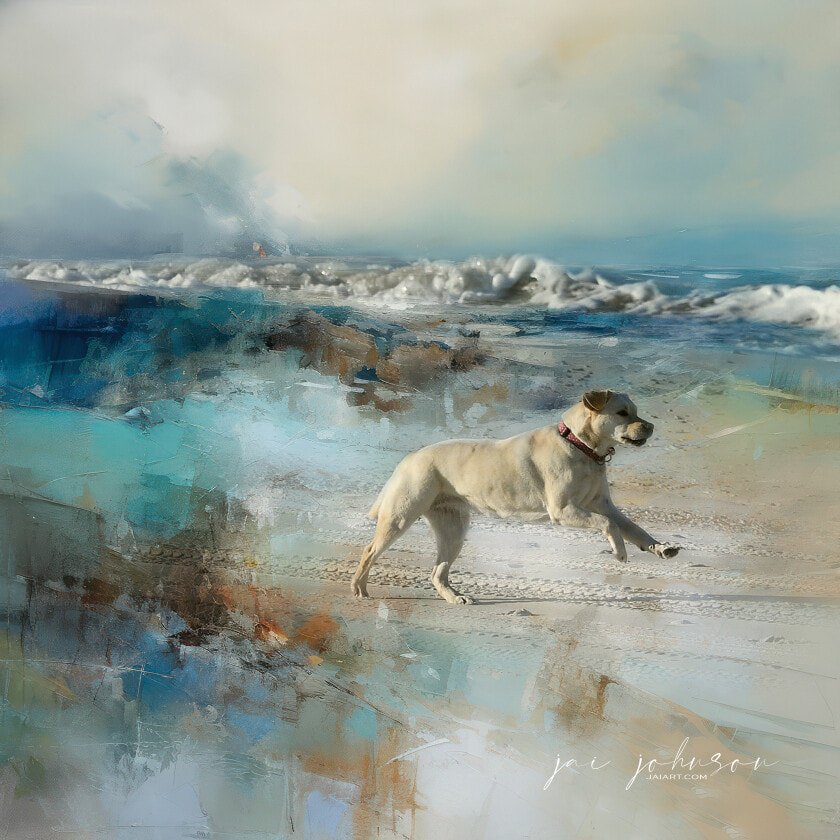 A summer vacation at the beach offers countless opportunities for photography enthusiasts and travelers alike. From picturesque seascapes to the lively beach atmosphere, there is something for everyone to capture. Remember to experiment with different angles, lighting conditions, and techniques to create visually captivating images. Also remember to always be respectful of people's privacy and the natural environment while photographing at the beach. So grab your camera, head to the beach, and embark on a photographic journey that will preserve the essence of your summer vacation for years to come.
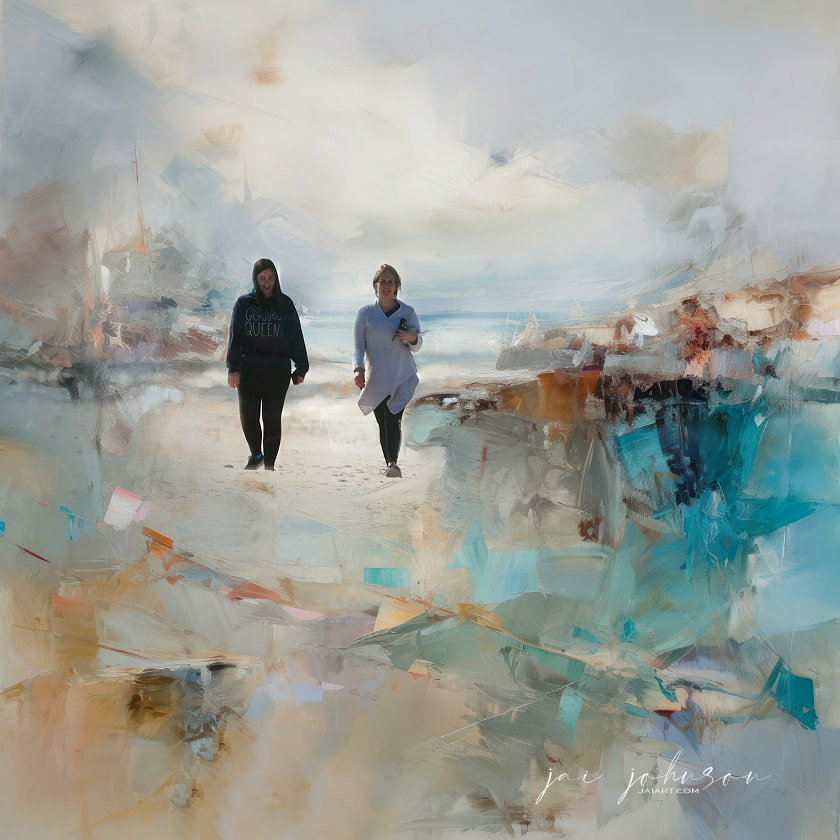
 When it comes to blending photos with new backgrounds and textures, making thoughtful and creative choices is crucial to achieving a harmonious and captivating composition. Whether you're working on a simple portrait or aiming to tell a unique story, the decisions you make regarding backgrounds and textures should always support and enhance the subject of your original photo. In this post, we will explore various aspects of blending photos, including color considerations, eliminating distractions, and concealing photographic mistakes, to create stunning and seamless final artworks. 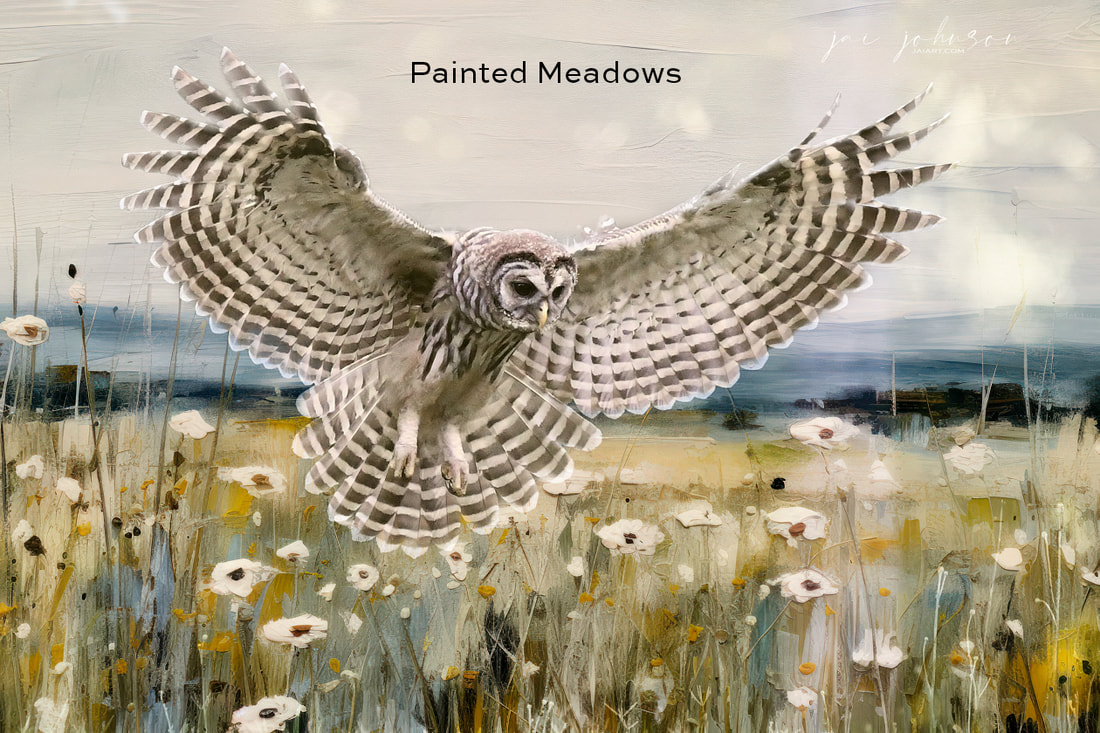 The Power of Creative Choices: Blending photos allows for immense creative freedom, enabling you to transform the mood, context, and narrative of an image. When selecting a new background or texture, consider the emotions and atmosphere you wish to convey. Whether it's a serene landscape, a bustling cityscape, or an abstract pattern, ensure that the chosen elements complement and amplify the subject's essence and intended message. 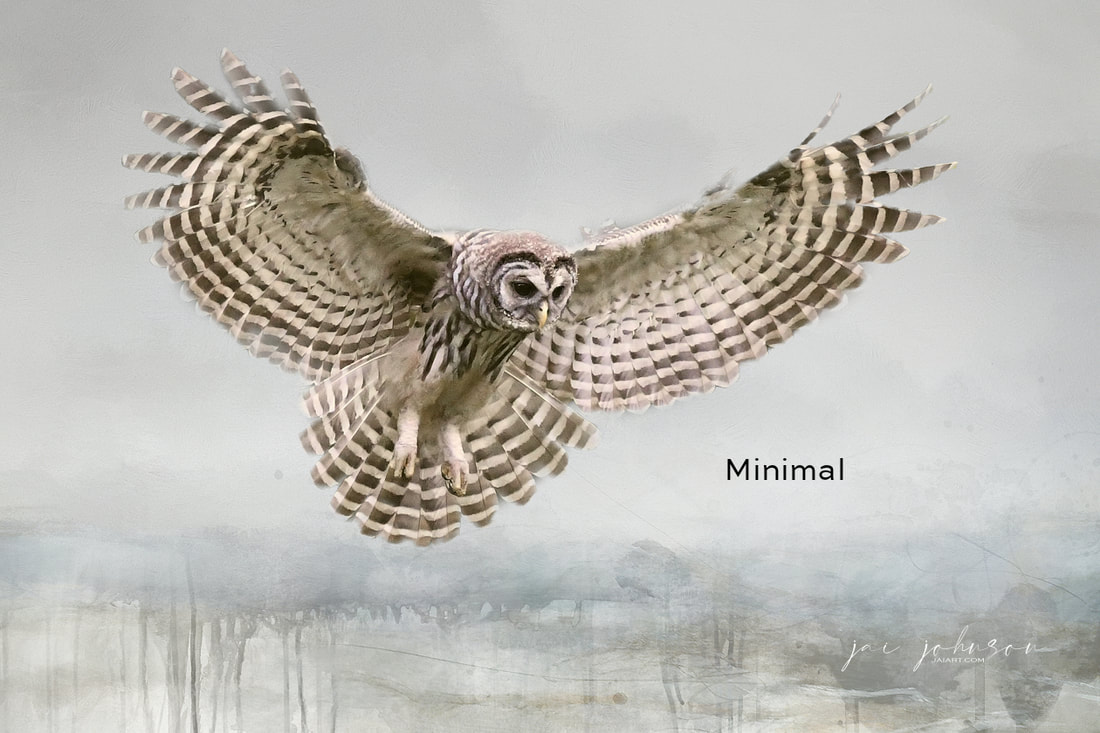 Harmonizing Colors: Colors play a significant role in creating visual impact and establishing a cohesive composition. When blending photos, pay attention to the color scheme of the original image and choose a background and textures that harmonize with it. Consider using complementary colors to evoke balance and harmony or contrasting colors to create visual interest and highlight specific elements within the image. 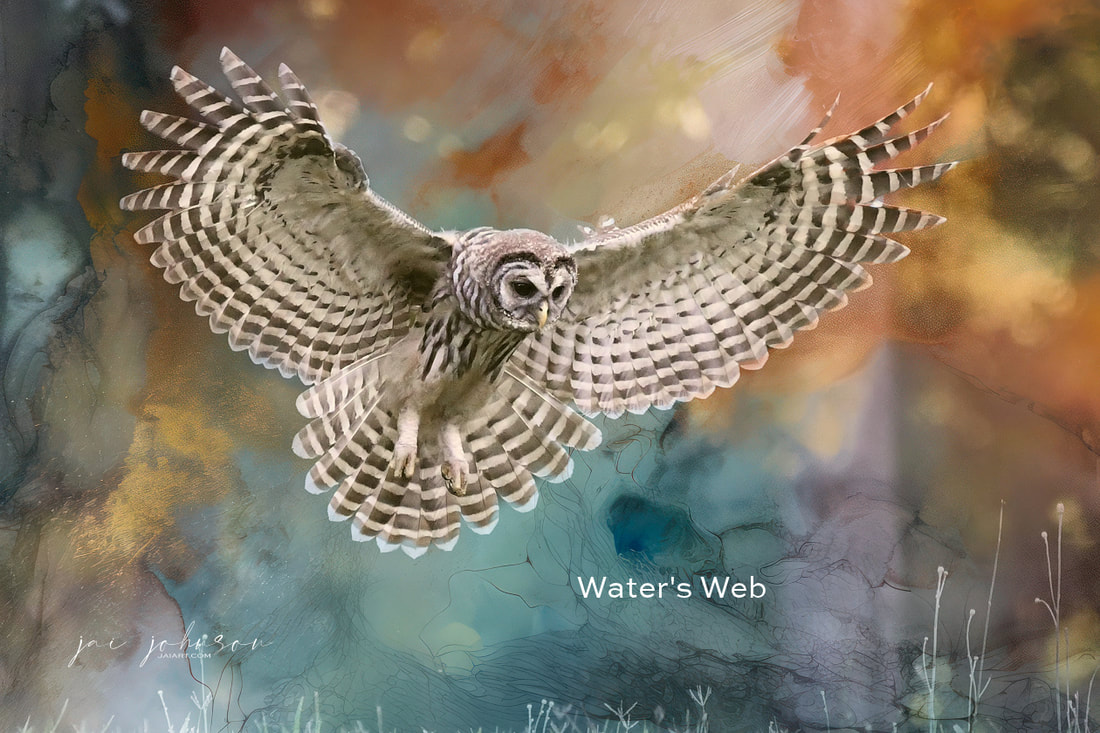 Eliminating Distractions: One of the key objectives in blending photos is to remove distractions and maintain focus on the subject. Before incorporating a new background or texture, carefully analyze the original photo for any elements that may divert attention. Remove or blur these distractions using photo editing tools to ensure that the subject remains the central point of interest. 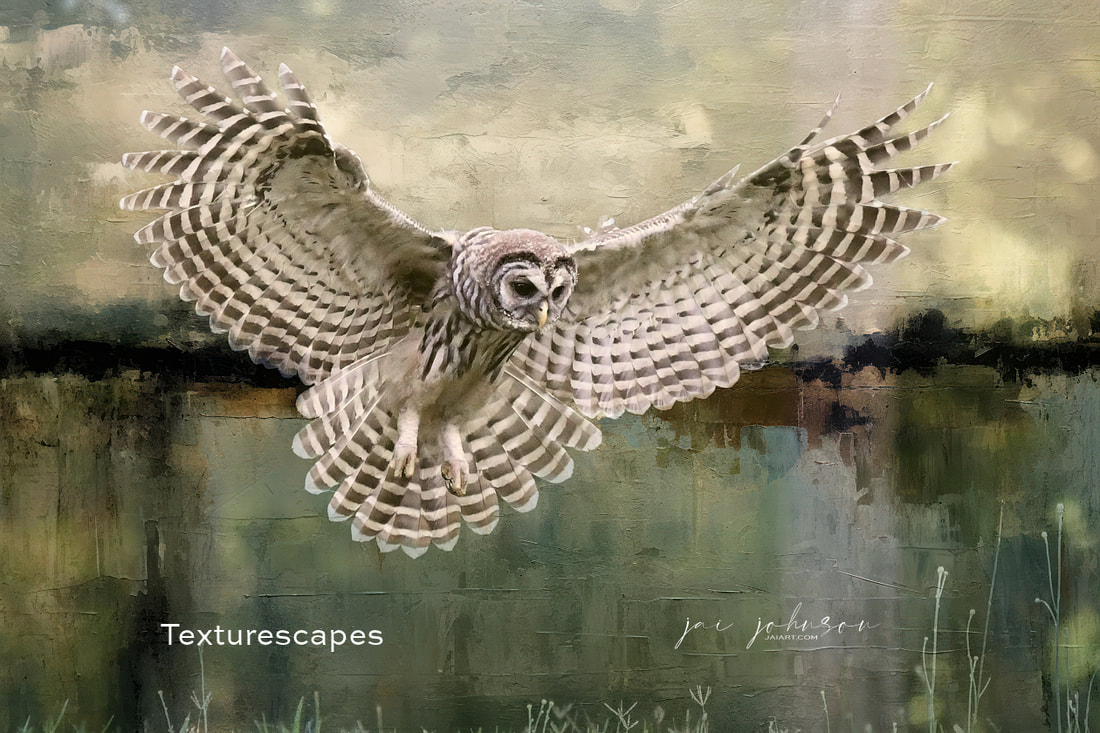 Crafting a Narrative: Blending photos can go beyond simply placing a subject in a new environment; it allows you to tell stories or create alternative portrayals. Think about the story you want to convey or the message you want to communicate through your artwork. Consider how the new background and textures can enhance the narrative, adding depth, symbolism, or context to the image.  Concealing Photographic Mistakes: Sometimes, photographs may have unintended flaws or imperfections, such as cropped feet or clipped wings. Blending photos with new backgrounds and textures offers an opportunity to minimize or even conceal these mistakes. By using soft and subtle blending techniques, you can seamlessly integrate the subject into the new environment, reducing the visibility of any flaws. Additionally, incorporating textures strategically can further mask imperfections and add visual interest to the final composition. 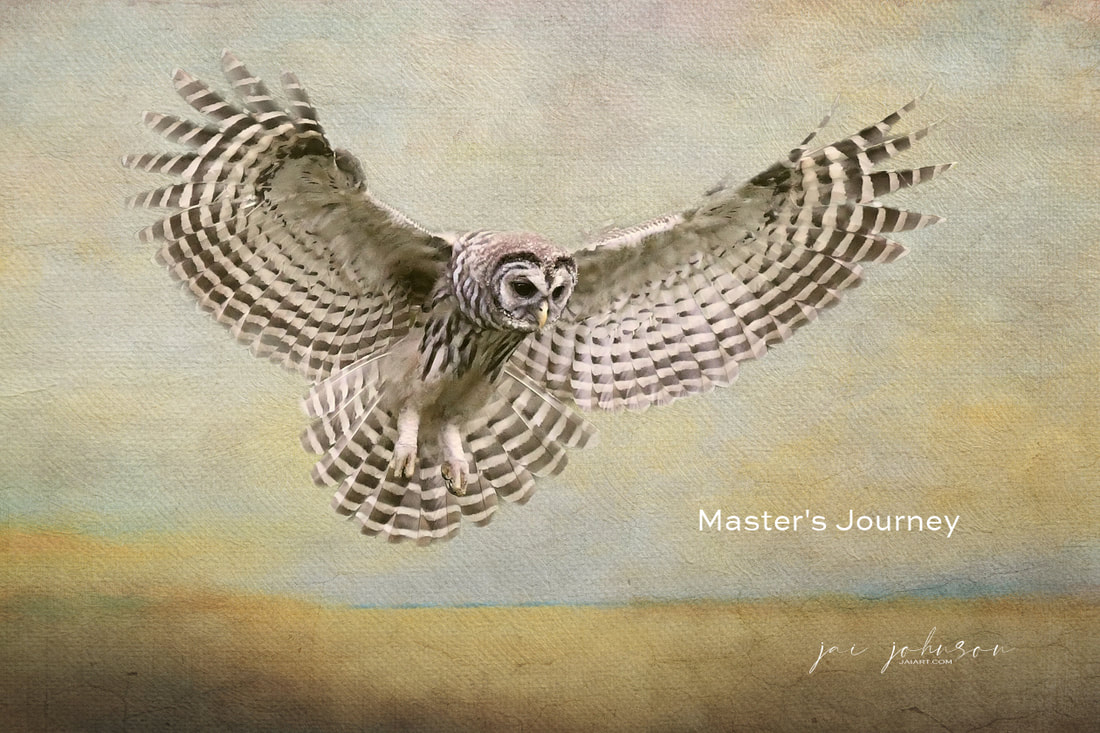 Blending photos with new backgrounds and textures is a powerful artistic technique that allows you to create captivating and impactful compositions. By making creative choices, considering color harmonization, eliminating distractions, and concealing photographic mistakes, you can achieve a harmonious and visually compelling final artwork. Remember, every decision you make should support and enhance the subject of your original photo, enabling you to tell stories, evoke emotions, and create captivating visual narratives through your blended photos. 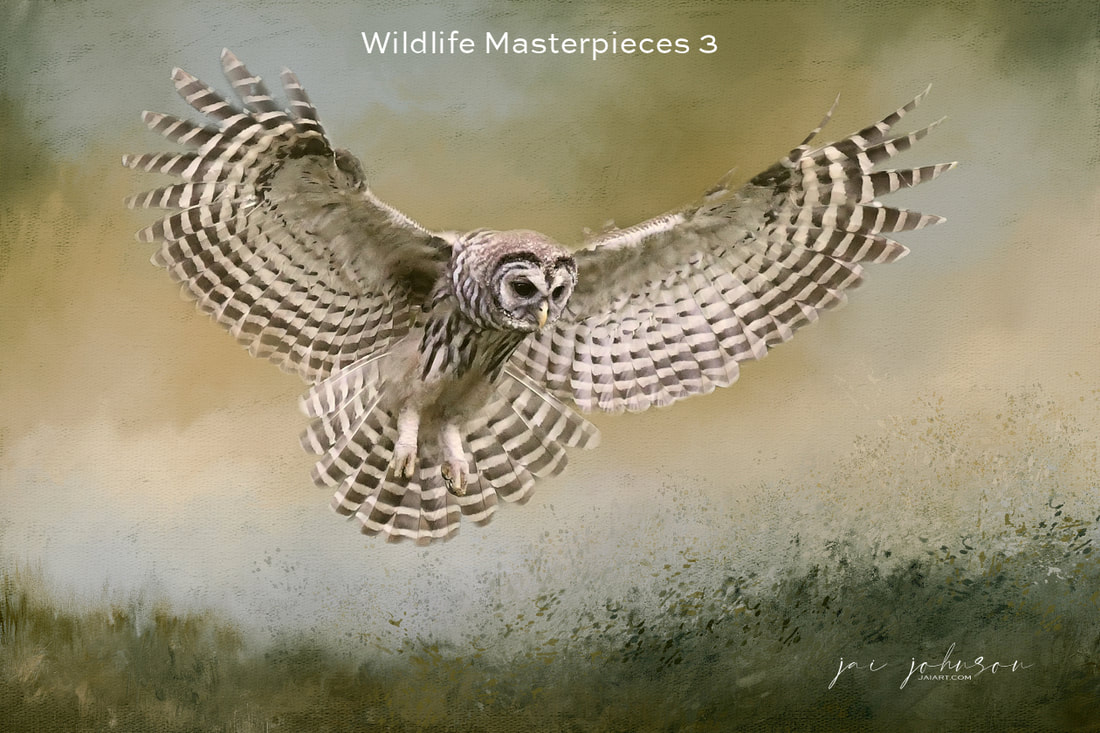
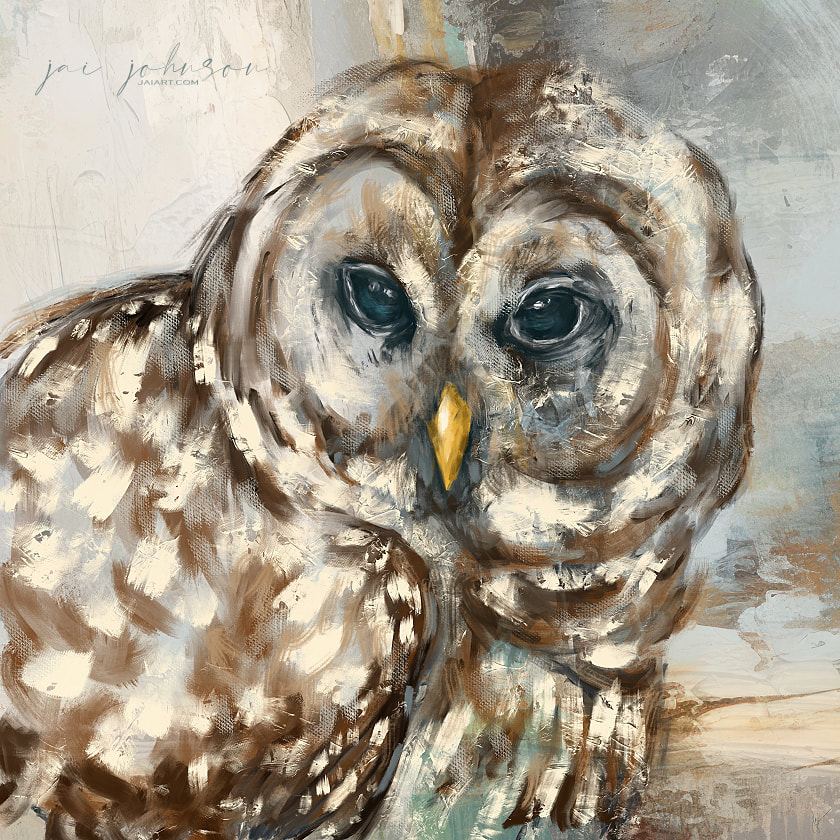
You're invited to enjoy this demo video, where I talk you through my process of doing this fun owl painting in Procreate. Using one of my original photos of "my" owl, Miss Ollie, I sketch out the design and create the painting using various brushes on top of one of my new Texturescapes textures.
I tell people all the time how my textures make fantastic backgrounds for digital paintings, and this video was created to show you exactly how I use them when I'm doing a digital painting on top of textures. Ollie is one of my favorite birds I photograph regularly, so I'm always delighted to do a new painting of her, and I hope you'll enjoy watching her video! The process I share here can also be accomplished in Photoshop and Corel Painter, and any other painting program where you have the ability to paint on different layers.
The Finished Art:
Get The Texturescapes Collection!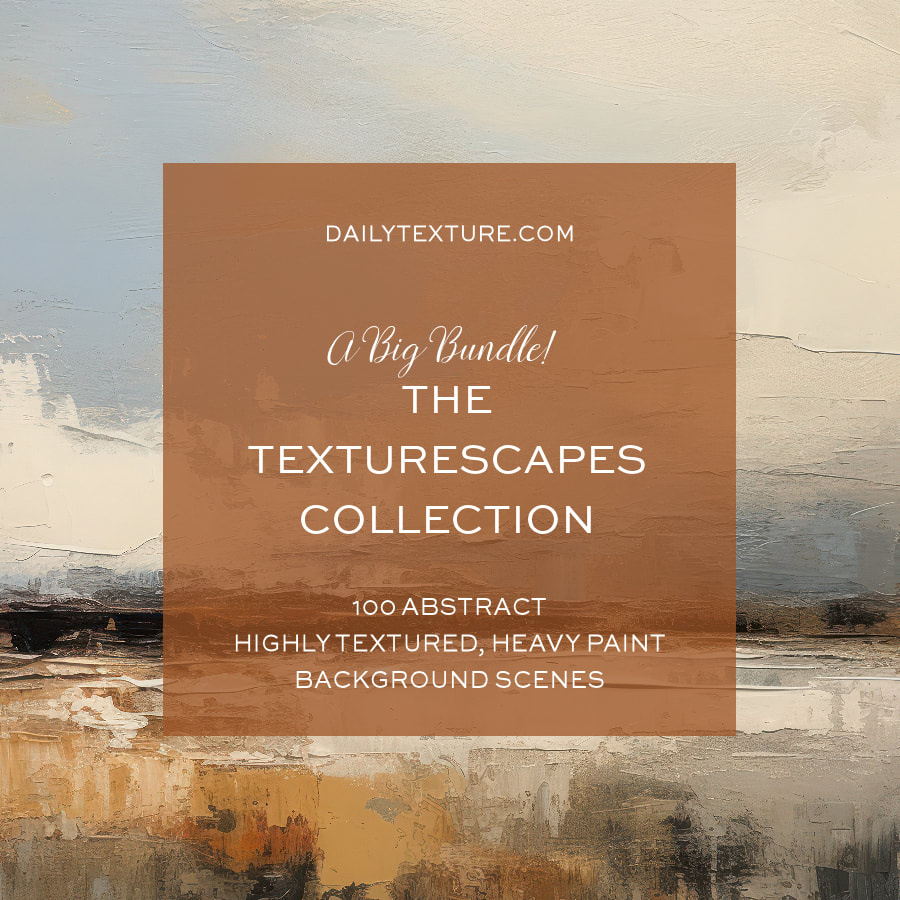
OK, how do I say this nicely...I'm not sure there is a way. But I will try...
On a recent Youtube video someone left me a smart alec comment, once AGAIN complaining {this person has sent multiple emails over the years saying the same darn thing!}, that I use an "obsolete software", and that I "should be" doing videos in Photoshop, On1, Luminar Neo, etc. This is a person who has been with me for years, and is one of the few I have that seem to always have to complain about something, and often the same thing over and over again -- as if those nasty comments are going to encourage me to do what they wish. This person obviously has not learned my VERY SIMPLE process of how I work, despite the fact I've done almost 100 FREE VIDEOS throughout the years, as well as made multiple blog posts and even given written "recipes" for a while. People like this who complain and demand I demo every software out there just to appease them really irritate me. I'm sorry, but they do, because I am not a "software" teacher. I am an ARTIST and a PHOTOGRAPHER. I make backgrounds to offer to you which you can use with your photos just like I do. I have shown repeatedly how I do it. I am an ARTIST and a PHOTOGRAPHER, not a software instructor. If someone has truly learned my process, it doesn't matter WHAT software they use. The software has to have two functions: LAYER ABILITY and MASKING ABILITY. The process is VERY simple: 1) Put texture on bottom layer 2) Photo photo on layer on top of that 3) Mask background away from the subject on the photo layer. Do not erase, do not "cut out" -- MASK, using a soft round masking brush, varying the opacity of the brush depending on how much of the original background you wish to remove. Want to remove the whole background? Mask at 100%. Want to leave a hint of the background showing? Mask at maybe 30% or 50% opacity. It's all about what YOU want for your finished work. That's it. Very simple. When choosing a software to use in order to do what I do, it's important to see if you can 1) Layer and 2) Mask using that software. Can't do those things? Don't use that software. Pick a different one that DOES do those things. Do I often add textures on top as well in different layer modes? Yes. But that's extra to the basic process above. And as long as you have layering ability, you can do that as well. As for MY software choices {I use two VERY old, yes "obsolete", programs on my desktop}, the reason I continue to use my older software is that it's what I'm most comfortable with and have been using for many years, allowing me to maintain a consistent workflow. I mean think about it, if I am out there buying and learning EVERY SOFTWARE and doing videos on how to use them, that makes me a software instructor instead of an artist. That means I have no time to complete my own art projects, nor do I have time to make backgrounds and textures for YOU to use as well. I don't "need" to be a software instructor. There are already MILLIONS and if someone would just search Youtube for what they wish to learn in their particular software of choice, they will find someone to show them how to do what they need to do. I don't need to be the one to show everyone how to layer and mask in every imaginable software and app available. That is not what I do. I HAVE done a couple of examples in other software on my LEARN page, which despite me directing people to, it seems many ignore it. On that page, I have a video on how to blend a texture with an image in Photoshop. It's a very simple video. It goes over the process. There is no need for me to do a video on very piece of work I create in a software I don't regularly use. As I said above, I am not a software instructor. I do recommend a GREAT course, also on my LEARN page to learn EVERYTHING about Photoshop from a software instructor. Whether people decide to take the course is up to them, but I can assure you, I am NOT going to be teaching it. And frankly the more people who leave me nasty comments or send nasty emails chewing me out because I don't use that software or whatever else they "think" I should be using, the more firm I stand in my position that I will NEVER use those software applications. I have my favorites, they fit my workflow, and they will be what I continue to use to get done what I need to in the fastest way possible for me. So, all that being said, I encourage everyone to use the software they feel most comfortable with or find suitable for their needs. The key aspect of my tutorials is to showcase the blending technique and inspire creativity rather than focusing solely on the software used. Anyone in the future who wants to spend their time leaving me nasty comments or sending emails "demanding" I use a different software will simply be referred back to this post {if I even respond}, as I am done discussing it. -- Jai 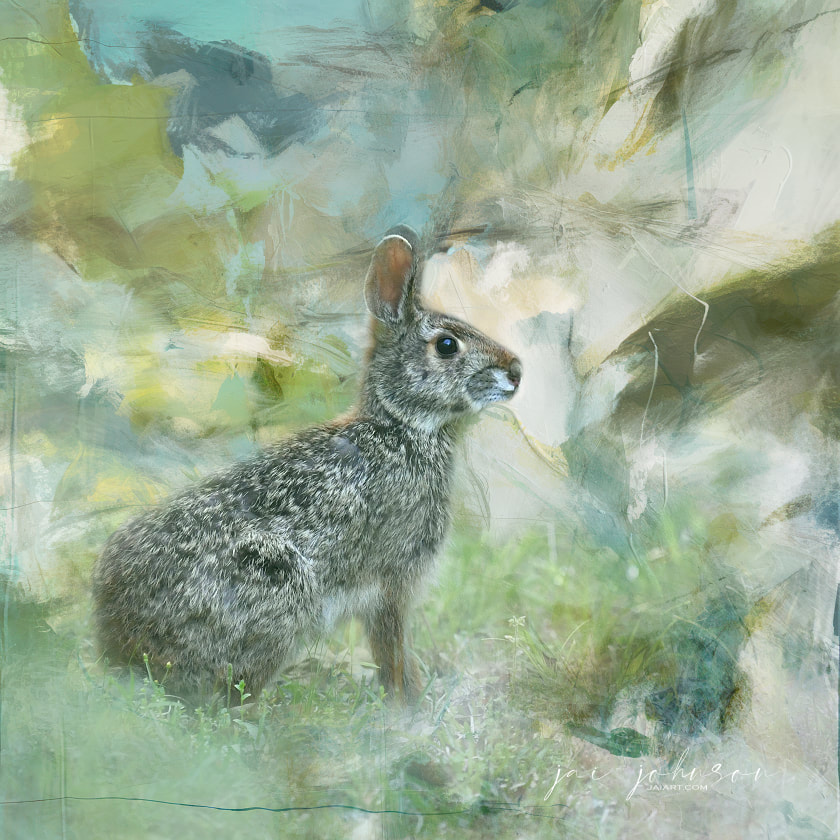
Photography is an art form that has the power to capture moments in time and convey emotions in a way that words cannot. However, some photographers may find themselves stuck in a comfort zone when it comes to creating art with their photos. They may feel limited by the real-life environments they shoot in or feel bound by the rules of accurate representation.
It's important for photographers to realize that everything doesn't have to be as it is in real life when creating art. Stepping out of their comfort zone and letting creativity lead them can result in new and exciting scenes and presentations. In fact, the most creative and interesting art often comes from taking risks and pushing boundaries. One way to create photo art is to experiment with different techniques for blending photos with textures and backgrounds. By blending photos with different textures and backgrounds, you can create a unique and interesting look that sets your work apart. You can take a simple photo of a bunny rabbit in sitting in the grass, for example, and turn it into a piece of work with an abstract and more freeform feel, simply by blending the photo with a few textures as in the example shown above. Before you start experimenting with textures and backgrounds, it's important to start with a strong foundation. To create compelling photo art, you need to pay attention to lighting, composition, and color when you take your photos. You want your base image to be something that can stand on its own, but that also has the potential for further creative exploration. Once you have a strong base image, you can begin to experiment with different techniques for blending it with textures and backgrounds. When creating ART with your photos, remember everything doesn't have to be accurately portrayed. Use your creativity to play with reality and create scenes and presentations that are outside of the norm. You could take a lion out of its natural environment and put it in a place it would never be in real life, or you could create a surreal landscape that doesn't exist in reality. Let your imagination run wild and see where it takes you. Don't be limited to what the photo gives you straight from the camera, or how a subject would "normally" be seen. Digital painting techniques are also a fantastic way to create artistic images. Digital painting is a powerful tool that allows you to take your photos in new and unexpected directions. This can involve anything from adding color and shading to painting new elements into the scene. Digital painting is a great way to turn a photo into a work of art that is truly unique and unexpected. The most important thing when creating photo art is to let your creativity run wild. Try new things and push the boundaries of what photography can do. Try combining different photos to create surreal or dreamlike scenes, or use digital painting to turn your subjects into something entirely new if you wish. Sometimes the most interesting and unique art comes from pushing boundaries and taking risks. Don't be afraid to make mistakes or experiment with unconventional techniques and artistic choices. With a strong foundation and a willingness to explore new creative possibilities, you can create stunning works of art that push the boundaries of what your camera portrays. So don't be afraid to step outside of your comfort zone and try something new – you never know what amazing results you might achieve! NEW:
P.S. Watch me create the first art pieces which inspired the Cool Mist Texture Collection in the video below!
One thing I love to do when I'm feeling a lack of creativity is to build a new background from existing backgrounds. Of course, the backgrounds I create are always ready for you to blend with your photos and digital paintings right "out of the box" - it makes it super easy for you to create new works of art quickly. Sometimes I don't know WHAT I want to create, however, and I feel a bit stuck. I may have a color or texture or some vague vision in mind, but just don't know where to go. This is when I do a short creative exercise to build a new background. I usually start by opening up two texture sets and choosing two different textures. Bringing them into my photo editing software, I will then begin to work on layering and blending the two choices. In the example below, I chose one of the Frosted 2 textures and one of the Spectrum Purple textures to work with. I felt like I wanted to so something with some heavy texture, and the Frosted 2 collection is full of heavy texture. But purple and lavender colors have been on my mind, because I have some purple flowers growing here. This is what I came up with: 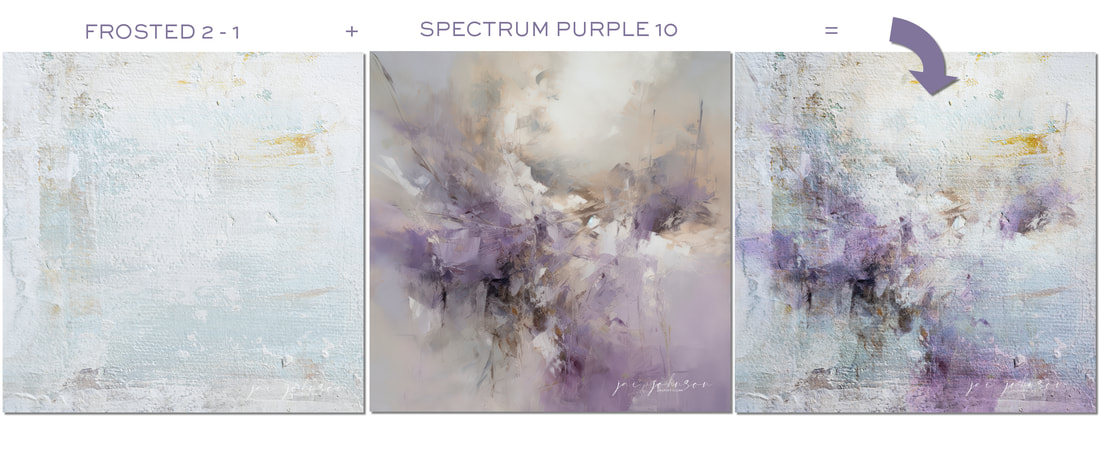 Here's a rundown on my layers list for the above, from top to bottom: Layer 5 - Frosted 2 (1) - Soft Light layer mode @ 50% Layer 4 - Frosted 2 (1) - Multiply layer mode @ 100% Layer 3 - Spectrum Purple 10 - Hard Light layer mode @ 100% Layer 2 - Spectrum Purple 10 - Multiply layer mode @ 30% Layer 1 - Frosted 2 (1) - Normal layer mode, full opacity. Here's a closer look at the new background texture I've created, which I can now blend with anything I wish: 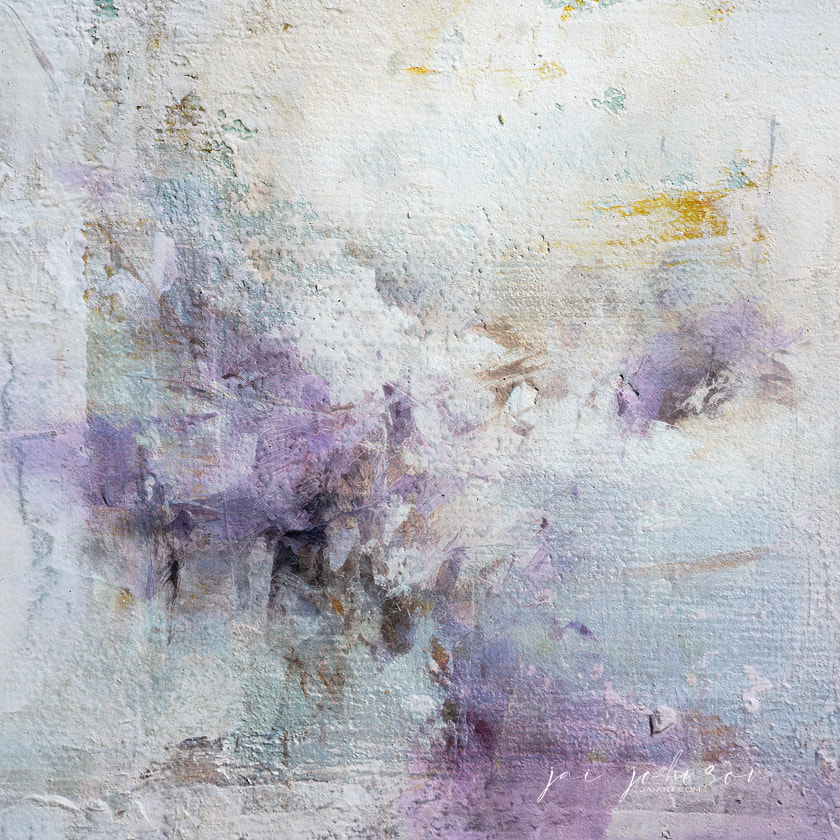 Blending some of your purchased backgrounds together can be a great way to create a unique and personalized design. It allows you to combine your own artistic style and vision with the versatility and complexity of the texture backgrounds, as well as creative something a little different only you may think of. Here are the steps for blending your backgrounds together to create a new design: Step 1: Choose Your Backgrounds Choose the painted backgrounds that you want to blend together. Look for backgrounds that have complementary colors, textures, and styles. This will help you create a cohesive and visually appealing design. Step 2: Overlay the Backgrounds Once you have chosen your backgrounds, overlay them in your design software. Position the second background on top of the first background. Adjust the opacity and/or layer mode of the second layer until you can see both backgrounds together. Repeat this step for each background that you want to blend together. Step 3: Adjust the Blend Mode Adjust the blend mode of each layer until you find what works well with your vision. Experiment with different blend modes to achieve the desired effect. You can also adjust the opacity of the top layers to fine-tune the blending. Step 4: Refine the Blending Use layer masks to refine the blending of the painted backgrounds. You can use the layer masks to hide or reveal parts of a top layer. This will allow you to blend the two textures together seamlessly and create a new design that is unique to you. Step 5: Repeat the Process If you want to add more backgrounds to your design, simply repeat the process. Overlay the third background on top of the first two, adjust the blend mode, and refine the blending. You can repeat this process as many times as you like until you achieve the desired result. Blending your own painted backgrounds together to create a new design is a great exercise to get your creative juices flowing! It allows you to experiment with different colors, textures, and techniques to create a unique and personalized design. By overlaying the backgrounds, adjusting the blend modes, and refining the blending if needed, you can create a new design that is different from using your backgrounds "straight out of the box". So, go ahead and experiment with blending your backgrounds to create something new and exciting, exclusive to you! P.S. Be sure to SAVE your new background with a new name, so you can use it again in the future for your artistic projects! Collections Used:
|

Be sure to join the Daily Texture Mailing list to keep up to date on new collections!
You may find these two links useful: • Frequently Asked Questions • Helpful Links and Information 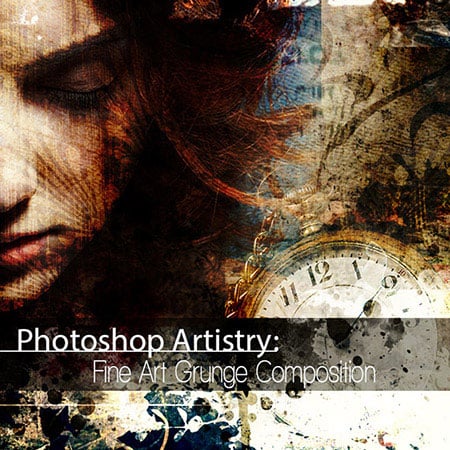 In most of my videos, I use older software which I've used for years. Unfortunately, the software I use isn't being sold anymore.
Many of you have asked me to teach in Photoshop -- but I am just learning myself in that software. In my learning, I have discovered the best Photoshop training on the planet, and I have secured a special offer on this same training JUST FOR YOU! Click the button below to learn from my same trainer, and to save a HUGE amount on this lifetime access course: Please note: Some collections shown in older blog posts have been retired and are no longer available. The blog posts have been left for you to view for learning purposes and examples of what can be done using the Daily Texture resources. As always, for the most current available collections, please visit the store here.
Archives
April 2024
|


 RSS Feed